Have you ever experienced the bliss of curling up under a cozy blanket, only to find yourself engaged in an intense battle against stubborn lint?
It’s as if those tiny fibers have a secret agenda to infiltrate every inch of your beloved blanket.
As a self-proclaimed snuggle-on-the-couch enthusiast, I understand this struggle all too well. When your beautiful new blankets slowly collect lint, they start to look sad and worn out.

But fear not!
I’ve saved many a blanket over the years, and I want to share with you the practical tips and techniques I’ve discovered.
So, whether you’re a fellow blanket aficionado or simply seeking ways to keep your cherished textiles lint-free, join me as we dive into the world of lint removal and reclaim our blankets.
Fabric Shaver

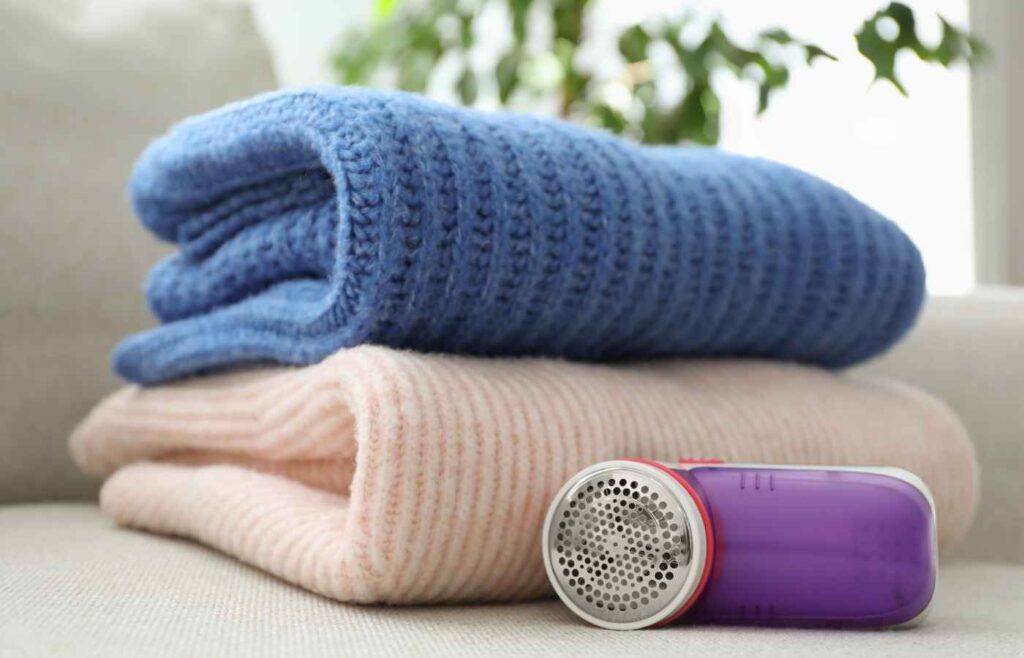
A fabric shaver is an absolutely must-have tool in your laundry cabinet. (This is the fabric shaver I use.)
It removes lint, fuzz, and pilling from blankets, and it’s extremely satisfying to watch.
Here’s how a fabric shaver works:
a. Blade mechanism: Fabric shavers typically have a rotating blade mechanism covered by a protective mesh or guard. The blades delicately glide over the fabric surface, precisely cutting and removing lint and pilling without causing damage.
b. Gentle and controlled shaving: When using a fabric shaver, you’ll gently glide the device over the blanket, allowing the blades to safely shave off the protruding lint and pilling. The protective mesh or guard ensures that the blades do not come into direct contact with the fabric, minimizing the risk of accidental snags or tears.
c. Adjustable settings: Many fabric shavers offer adjustable settings to accommodate different fabric types and levels of lint or pilling. This allows you to customize the shaving intensity based on the specific needs of your blankets. For more delicate fabrics, you can use a lower setting to ensure a gentle treatment, while heavier fabrics may require a slightly higher setting for effective removal.
d. Effective pilling removal: Pilling occurs when loose fibers tangle and form small balls on the fabric surface. A fabric shaver is designed to target these pills and safely remove them. As the blades rotate, they carefully cut and lift the pills, creating a smoother and more uniform appearance on the blanket.
e. Careful maneuvering: While using a fabric shaver, it’s important to maneuver the device with care. Move it in straight, smooth motions over the blanket’s surface, avoiding excessive pressure or prolonged focus on one area. This helps to evenly distribute the shaving action and prevents any potential damage to the fabric.
f. Easy cleanup: As you shave the blanket, the lint and pilling will be collected in a built-in container or compartment within the fabric shaver. This makes cleanup convenient and prevents the shaved lint from spreading around.
Using a fabric shaver is a safe and effective method to remove lint and pilling from blankets. With its gentle yet efficient shaving action, you can revive your blankets, restoring their softness and ensuring a renewed visual appeal.
Follow these steps to use a fabric shaver properly and safely:
- Prepare your blanket: Ensure that your blanket is clean and free from any debris or larger particles. Lay it on a flat surface, ready for the fabric shaver.
- Inspect the fabric shaver: Before using the fabric shaver, familiarize yourself with its features and any instructions provided by the manufacturer. Ensure that the shaver is clean, in good working condition, and the blades are not damaged.
- Test on a small, inconspicuous area: Before using the fabric shaver on the entire blanket, it’s a good idea to test it on a small, inconspicuous area. This helps you determine the shaver’s effectiveness and how the fabric responds to the process.
- Gently run the fabric shaver across the blanket: Holding the fabric shaver at a slight angle, lightly run it across the surface of the blanket. Use smooth, straight strokes rather than circular motions. Apply a gentle amount of pressure, allowing the shaver’s blades to capture and remove the lint and pills.
- Pay attention to delicate areas: Be cautious when using the fabric shaver on delicate or sensitive areas of the blanket, such as decorative stitching or loose weaves. Adjust the pressure or avoid those areas altogether to prevent damage.
- Empty the lint compartment: As you use the fabric shaver, it will collect lint and pills in its compartment. Regularly pause and empty the lint compartment to maintain the shaver’s effectiveness. Follow the manufacturer’s instructions on how to do this properly.
- Continue shaving until satisfied: Keep shaving the blanket until you’ve removed the desired amount of lint and pills. Take breaks if needed to rest the fabric shaver and prevent overheating.
- Inspect the results: Once you’ve finished using the fabric shaver, carefully examine the blanket to ensure you’ve achieved the desired outcome. If there are any remaining stubborn lint or pills, you can repeat the process or consider alternative methods for their removal.
Voila! There’s nothing more satisfying than a good before-and-after with a fabric shaver. Using a fabric shaver requires a gentle touch and careful attention to the fabric’s condition, but it’s worth it.
Lint Roller

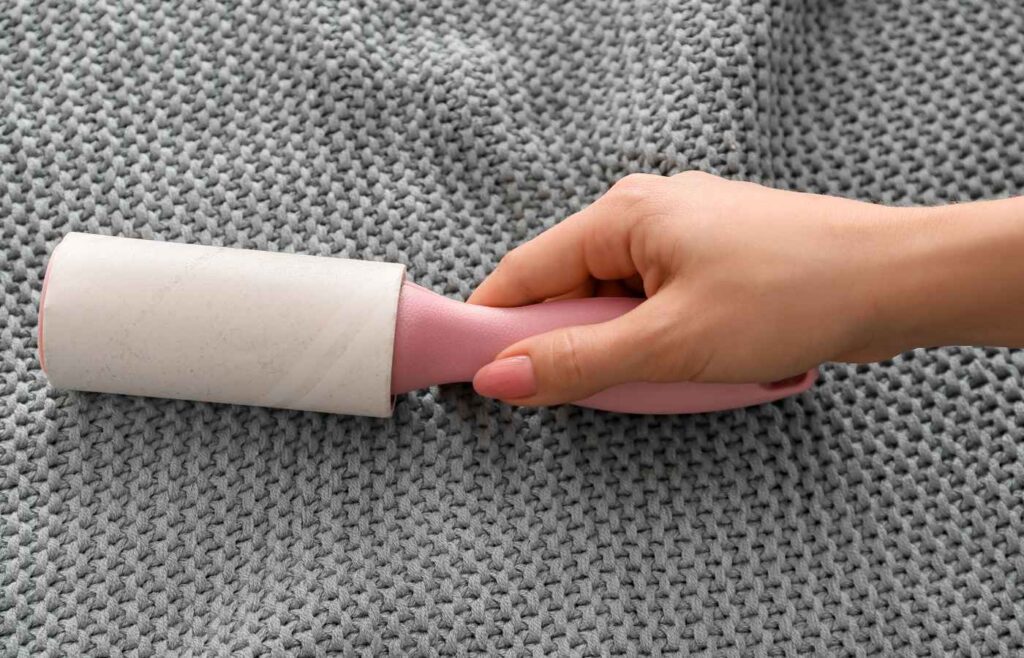
When it comes to quickly tackling surface-level lint on your blankets, a lint roller is a true hero. This handy tool picks up lint and fuzz quickly and easily.
(I keep one of these lint rollers in my car, one in my laundry room, and one in my bedroom.)
Here’s why you need to have them on hand:
a. Easy and convenient: Lint rollers are incredibly easy to use, making them a convenient option for an on-the-go lint remover. With a simple roll over the surface of your blanket, the sticky adhesive on the lint roller sheets will grab hold of so much lint, pet hair, and other debris, ensuring a clean and tidy appearance.
b. Effective on various fabrics: Whether you have a fleece blanket, a wool throw, or a smooth cotton sheet, a lint roller is versatile enough to handle different fabric types. It’s particularly effective in picking up loose fibers and lint that sit on the surface of the fabric.
c. Swift lint removal: One of the key advantages of a lint roller is its ability to quickly and efficiently remove surface lint. With just a few rolls, you’ll see the adhesive sheet collect lint, leaving your blanket visibly cleaner. It’s a perfect solution for last-minute touch-ups before guests arrive or for freshening up your blankets between more thorough cleaning sessions.
d. Portable and travel-friendly: Lint rollers are lightweight and compact, making them ideal for use at home or while you’re on the go. Whether you’re traveling or simply need to freshen up your blankets in different rooms, a lint roller can easily be carried in a bag or stored in a drawer for quick access whenever you need it.
e. Disposable and replaceable: Most lint rollers come with replaceable adhesive sheets, allowing you to easily dispose of the used sheets and install fresh ones when needed. This makes maintenance hassle-free and ensures that the lint roller remains effective for future use.
So, when you’re in a hurry or want a fuss-free method for removing surface lint from your blankets, reach for a lint roller. Its convenience, effectiveness, and portability make it an indispensable tool in your lint removal arsenal.
Follow these steps to make the most of your lint roller:
- Prepare your blanket: Lay your blanket flat on a clean surface, ensuring it’s free from any debris or larger particles.
- Unroll the sticky adhesive sheet: Hold the handle of the lint roller and find the edge of the sticky adhesive sheet. Gently peel off a section of the sheet, exposing the sticky surface underneath. Be careful not to touch the adhesive with your fingers to maintain its effectiveness.
- Start rolling: With one hand on the handle and the sticky sheet facing down, begin rolling the sticky lint roller over the surface of the blanket. Apply gentle but firm pressure to allow the adhesive to catch and lift the lint effectively.
- Roll in one direction: Roll the lint roller in one direction, moving it back and forth across the blanket’s surface. Avoid rolling in a back-and-forth motion, as it may not pick up lint as effectively.
- Overlap your rolls: The easiest way to ensure thorough lint removal is to slightly overlap each roll with the previous one. This way, you won’t miss any areas and can catch any remaining lint.
- Check and replace the adhesive sheet: Periodically, inspect the adhesive sheet to see if it’s filled with lint. If it becomes heavily covered or loses its stickiness, tear it off and expose a fresh, clean section of the adhesive sheet by pulling it from the perforated edge or using the built-in mechanism, depending on the lint roller design.
- Continue rolling until satisfied: Repeat the rolling process until you’ve covered the entire blanket or removed the desired amount of lint. Take your time and pay attention to detail to achieve a lint-free result.
- Dispose of the used adhesive sheet: Once you’ve finished using the lint roller, remove and dispose of the used adhesive sheet properly. Many lint rollers come with replaceable rolls or refills, so keep a supply on hand for future use.
Remember, lint rollers work best on surface-level lint, so they may not be as effective for deeply embedded or stubborn lint. However, they are handy for quick touch-ups and regular maintenance of your blankets.
Lint Brushes
A lint brush is another tool designed to remove lint, dust, and other particles from fabric surfaces. It typically consists of a handle and a brush head, which is covered in fine bristles or fabric.
These are more eco-friendly than lint rollers since they can re-used, and they are better for use on delicate fabrics.
(This is the lint brush I use on my husband’s suits.)
Using a lint brush is relatively simple:
- Preparation: Ensure that your blanket is laid flat on a clean surface, free from any larger debris or particles.
- Brushing technique: Hold the handle of the lint brush firmly and gently brush the fabric surface in short, sweeping motions. The bristles or fabric on the brush head will trap and lift the lint as you brush.
- Direction: For more effective lint removal, brush in the opposite direction of the grain of the fabric. This helps to dislodge the lint from the fibers and ensure thorough cleaning.
- Clean the brush: Periodically, check the brush head for accumulated lint. Remove the trapped lint by wiping or tapping the brush head against a hard surface or using your fingers to pick it off. Alternatively, some lint brushes have self-cleaning mechanisms where you can slide a button or lever to retract the bristles and remove the collected lint.
Now, let’s compare a lint brush to a lint roller:
- Effectiveness: Both lint brushes and lint rollers are effective in removing lint, but they work in slightly different ways. A lint brush uses bristles or fabric to grab and lift the lint, while a lint roller uses sticky adhesive sheets to pull a lot of lint away from the fabric surface.
- Portability: Lint brushes are often more compact and portable compared to lint rollers. They can easily fit in a bag or purse, making them convenient for quick touch-ups while on the go. Lint rollers can also be portable, but their larger size may make them less travel-friendly.
- Reusability: Lint brushes are generally reusable, as they do not require disposable adhesive sheets like lint rollers. With a lint brush, you can simply clean the brush head after use and use it again and again. Lint rollers, on the other hand, typically come with replaceable adhesive sheets that need to be replaced when they become filled with lint.
- Versatility: Lint brushes can be used on a variety of fabrics and surfaces, including clothing, upholstery, and blankets. They are often gentler on delicate fabrics and can be used for spot cleaning or removing lint from smaller areas. Lint rollers, while also versatile, are particularly effective on larger surface areas and may provide a more thorough lint removal.
Which one should you use?
Ultimately, the choice between a lint brush and a lint roller depends on your personal preference, the fabric type, and the specific lint removal needs. Both tools can be useful for keeping your blankets and other fabrics free from lint and maintaining their appearance.
Lint brushes are often gentler on delicate fabrics and can be used for spot cleaning or removing lint from smaller areas. They are also more environmentally friendly since you can re-use them.
Lint rollers, while also versatile, are particularly effective on larger surface areas and may provide a more thorough lint removal.
Tape

If you don’t have a lint roller on hand, sticky tape or masking tape can serve as effective alternatives for removing lint from blankets.
Here’s how you can use them to gently dab the surface and lift lint:
- Prepare the tape: Select a piece of sticky tape or masking tape that is long enough to comfortably hold between your fingers. For masking tape, you may need to fold it over itself to create a sticky side.
- Position your fingers: Hold one end of the tape between your thumb and forefinger, ensuring that the sticky side is facing outwards and ready to pick up lint.
- Gently dab the surface: Lightly press the sticky side of the tape onto the surface of the blanket where the lint is located. Using a gentle dabbing motion, touch the tape to the fabric and then lift it away. Repeat this process, focusing on the areas with lint until you’ve removed the desired amount.
- Replace or fold the tape: As you continue to dab the surface, the tape will accumulate lint. If the tape becomes too covered with lint, replace it with a fresh piece or fold the tape over onto itself to expose a new sticky surface.
- Dispose of used tape: Once you’ve finished removing lint, carefully peel off the used tape from your fingers or any surface it may have been stuck to. Dispose of the used tape properly to prevent lint from spreading.
When using sticky tape or masking tape as lint removal alternatives, it’s important to be gentle to avoid any damage to the fabric. If the adhesive is too strong or the tape is vigorously pressed onto the fabric, it may cause pulling or leave residue behind.
Use a light touch and test on a small, inconspicuous area first to ensure it doesn’t cause any adverse effects.
While sticky tape or masking tape can be effective for quick lint removal, they might not be as efficient as lint rollers or fabric shavers for larger surface areas or stubborn lint. However, they can be handy in a pinch or for targeting specific spots on your blankets.
What Not To Use
Some sources on these crazy internets recommend using a pumice stone or disposable razor to remove lint. I advice against this.
Disposable razors are primarily designed for shaving hair and are not specifically designed for fabric care.
The sharp blades of a razor can easily catch and cut the fabric fibers, leading to damage or fraying of the fabric. Using a pumice stone on fabric may also cause damage or snagging.
Washing & Drying

To maintain lint-free blankets, it’s important to follow proper washing and drying techniques.
(FYI, plush blankets, by their nature, can be more prone to lint accumulation compared to other materials. The plush fibers are soft and tend to shed more easily. Therefore, it’s important to take extra precautions to minimize lint buildup and remove lint as needed.
Blankets with synthetic fibers on the other hand are typically more durable and can withstand higher washing temperatures compared to delicate natural fibers.)
Here’s the best way to wash and dry your blankets to minimize lint buildup:
- Check the care instructions: Before washing your blankets, always check the care instructions provided by the manufacturer. Different fabrics and constructions may require specific care methods, such as specific water temperature, detergent type, or washing machine settings. Adhering to the care instructions will help preserve the quality of your blankets.
- Pre-treat stains and spills: If there are any visible stains or spills on your blankets, it’s best to pre-treat them before washing. Follow the instructions on your stain remover or spot cleaner to treat the affected areas. Allow the pre-treatment solution to sit for the recommended time before proceeding to the washing step.
- Use a gentle cycle and cold water: When it’s time to wash your blankets, opt for a gentle cycle on your washing machine. This will create less agitation and reduce the chances of lint being released or created during the wash. Additionally, choose cold water instead of hot or warm water, as cold water is gentler on fabrics and helps prevent lint from becoming more prominent.
- Use the rinse cycle: During the wash cycle, especially if it’s an agitating cycle, some loose lint may become dislodged from the fabrics. The rinse cycle helps to flush out and remove this loose lint from the fabric surfaces. Finally, if excessive detergent or residue is present on the fabrics, the rinse water helps dilute and remove it. Detergent residue can contribute to lint accumulation, as lint particles may stick to the residue on the fabric surfaces.
- Choose a mild detergent: Select a mild and gentle laundry detergent specifically designed for delicate fabrics. Be sure to use a wool-safe detergent for wool blankets. Harsh detergents can cause fibers to break down and increase lint production. (I use laundry soap flakes from The Laundry Guy.)
- Don’t use Fabric Softener or Bleach: Avoid using fabric softener or bleach, as they can also contribute to lint buildup. The best solution is to add a cup of vinegar to the fabric softener dispenser. Vinegar can act as a fabric softener and conditioner, helping to loosen lint and make it easier to remove. Adding vinegar to the rinse cycle of your washing machine can help reduce lint buildup on fabrics. Vinegar also has anti-static properties that can help reduce static cling in fabrics. Static cling can attract lint and make it stick to the surface of the fabric.
- Wash blankets separately: To prevent lint transfer from heavily linted items to your blankets, it’s best to wash them separately. Washing blankets with lint-producing items like towels, rugs, or clothing can result in more lint accumulation on your blankets.
- Don’t overload the machine: Overloading the washing machine can lead to increased friction between fabrics, resulting in lint generation. Ensure there is enough space for the blankets to move freely during the wash cycle.
- Select a low heat setting for drying: When it comes to drying your blankets, opt for a low-heat cycle, air-only cycle, or air-drying if possible. High heat can cause fibers to weaken and shed, leading to more lint. If using a dryer, consider using a gentle or delicate cycle to minimize agitation.
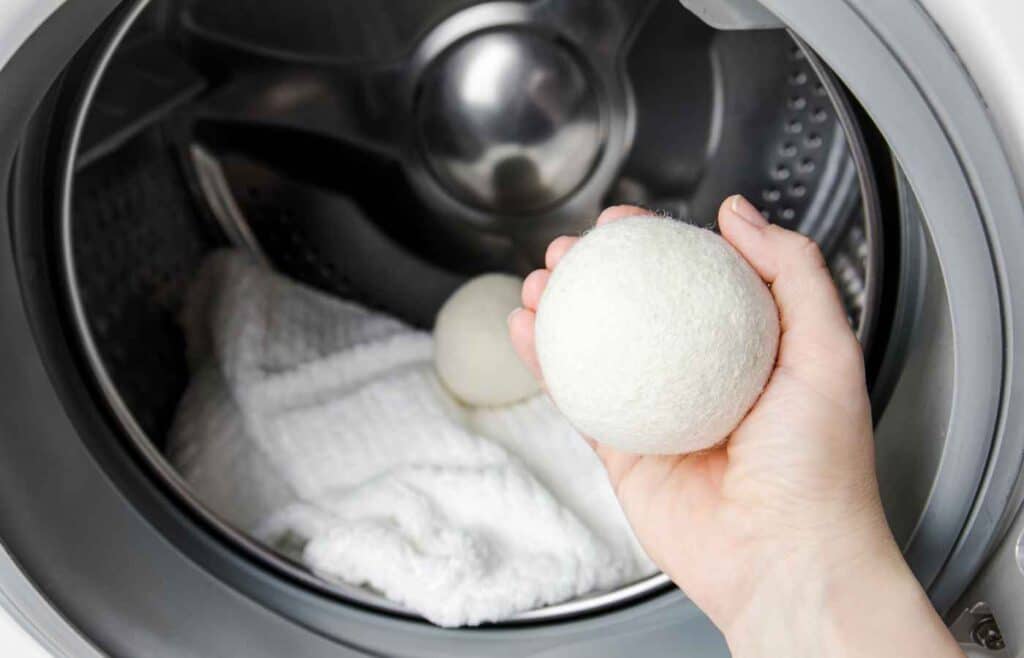
- Use tennis balls or dryer balls instead of dryer sheets: While a dryer sheet can reduce static cling, it can also contribute to lint transfer. Some dryer sheets contain substances that leave a residue on fabrics, which can attract lint and cause it to stick to the blankets. This can result in an increase in lint accumulation over time. One helpful tip is to use tennis balls or dryer balls instead. When placed in the dryer along with the blankets, these little balls provide additional agitation to loosen and separate the fabric fibers. This can help prevent lint from clumping together and reduce the formation of lint balls or pilling on the blankets. They can also help to accelerate the drying process of blankets. As they bounce around in the dryer, they create additional movement and space between the blankets, allowing more hot air to circulate. This increased airflow can help the blankets dry faster, reducing the chances of excessive lint buildup that may occur when the blankets are left damp for an extended period.
- Remove lint from the dryer: Once the drying cycle is complete, promptly remove your blankets from the dryer. Check for any loose lint that may have accumulated on the lint trap and remove it to prevent lint from reattaching to the blankets.
- Store blankets properly: To further minimize lint accumulation, store your blankets in a clean and dry environment. Avoid storing them in areas prone to excessive dust or lint, such as near vents or in closets with lint-producing items.
By following these washing and drying techniques, you can help reduce lint buildup on your blankets, keeping them looking clean and lint-free for longer periods.
Importance of Maintaining Lint-Free Blankets
When it comes to our cherished blankets, lint can be a pesky intruder that disrupts the visual appeal and comfort we seek. Those fine, fuzzy particles seem to have a knack for clinging to every thread, creating an unsightly layer that detracts from the blanket’s beauty. Whether it’s a luxurious wool blanket or a soft cotton throw, lint has a way of stealing the spotlight and diminishing the overall aesthetic we loved in the first place.

But beyond its cosmetic impact, lint can also pose a threat to the longevity and durability of our blankets. As those tiny fibers accumulate, they can weave themselves into the fabric, potentially causing pilling and weakening the structure over time.
To ensure that our blankets retain their beauty, softness, and durability, regular maintenance is key.
Taking proactive steps to keep them lint-free is a small yet essential investment in their upkeep. By incorporating simple practices and effective techniques, we can preserve the integrity of our blankets, prolonging their lifespan and ensuring many more cherished moments wrapped in their embrace.
Maintaining lint-free blankets is essential for both their appearance and longevity.
By incorporating these practical tips into our routine, you can enjoy lint-free blankets that envelop you in cozy comfort, creating a haven in our homes.
Here’s to many blissful, lint-free moments!
Related Posts
How To Wash Your Tie Dye Shirt For The First Time
How To Clean Your Child’s Clear Retainer
Calie Herbst, Editor-in-Chief of Milwaukee With Kids, has spent over a decade combining her experiences as a parent of three to create a hub for Milwaukee’s family adventures.
Her decade-long teaching career in Milwaukee Public Schools and academic background, including a Master’s in Teaching from Marquette University and dual B.A.s in Sociology and Spanish from the University of Wisconsin – Madison, fuel her passion for inclusive and engaging family content.
Calie is also a recognized voice in local media, contributing to WISN Channel 12 News, WTMJ Wisconsin Morning News, Fox 6’s Real Milwaukee, and B93.3.
Discover more about Calie’s journey and editorial approach on her About Page and Editorial Policy Page.


