Planning a memorable kids’ party involves juggling numerous elements, from decorations and games, to party favors and entertainment.
However, there’s one aspect that often takes center stage: The food!
The importance of food in a kids’ party cannot be underestimated. It sets the tone, fuels the fun, and keeps the young partygoers happily engaged.

But here’s the challenge: How can you create a culinary extravaganza without breaking the bank?
Fear not! In this blog post, we’ve curated a fantastic list of 50 kids’ party food ideas that will not only satisfy young appetites but also fit snugly within your budget.
So get ready to dive into a world of delicious and appealing treats that will satisfy kids of all ages and adults, too – all without emptying your wallet.
Let’s explore creative and budget-friendly ways to make your next kids’ party a culinary adventure to remember!
Fun and Creative Snacks
No matter the type of party, you’ll want to provide some party snacks for your guests. With a little creativity, you can level up your typical snacks and make them more festive and memorable.
Popcorn Bar
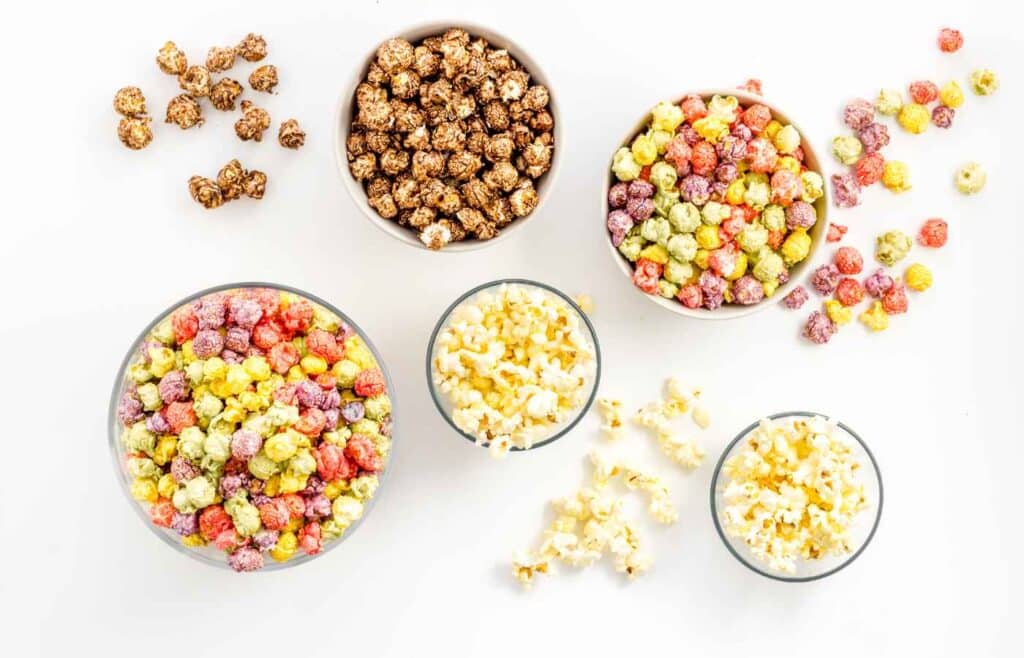
Setting up a DIY popcorn bar with various toppings and seasonings is a fun and interactive way to elevate your popcorn game and allow guests to customize their snack experience. It’s a great idea for kids’ parties, movie nights, or any gathering where you want to offer a delicious and customizable snack option.
A popcorn bar is versatile, interactive and engaging, and you can customize it for dietary preferences.
The best part? It’s an affordable snack option that allows you to stretch your budget.
Here are some ideas for popcorn toppings and seasonings to include in your DIY popcorn bar:
- Sweet Toppings: Caramel sauce, chocolate drizzle, powdered sugar, cinnamon sugar, crushed cookies or candies, sprinkles, or flavored syrups.
- Savory Toppings: Grated cheese (Parmesan cheese, cheddar, or flavored varieties), BBQ seasoning, taco seasoning, ranch seasoning, garlic powder, nutritional yeast, or spicy seasonings.
- Mix-Ins: M&M’s, mini marshmallows, pretzels, dried fruits (raisins, cranberries), chopped nuts, or popcorn seasoning blends.
- Healthy Options: Dried herbs (rosemary, thyme, oregano), grated lemon zest, nutritional yeast, grated Parmesan, or coconut flakes.
To set up the popcorn bar, provide plain popcorn as the base and offer a variety of toppings and seasonings in separate bowls or containers. Provide scoops or spoons for guests to add their desired toppings to their popcorn. You can also provide small paper bags or cups for guests to fill with their customized popcorn creations.
Remember to label each topping or seasoning so guests can easily identify their choices. Additionally, consider providing napkins or small plates for easy snacking and cleanup.
A DIY popcorn bar adds a delightful and interactive element to any gathering, allowing guests to enjoy a personalized and delicious snack experience. Get creative with your toppings and seasonings, and let the popcorn creativity flow!
Fruit Kabobs
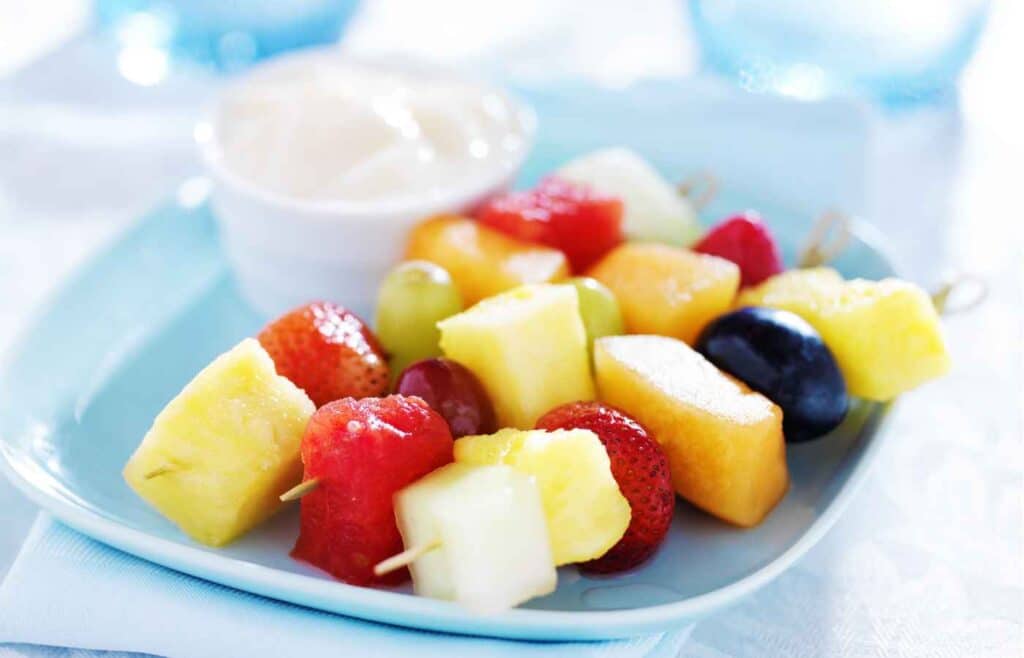
A fruit salad is all well and good, but fruit kabobs make a statement!
Creating colorful and healthy fruit skewers is a wonderful way to offer a refreshing and visually appealing snack at a kids’ party. Here are some fruits that can be threaded onto skewers to create a vibrant snack option:
- Strawberries: Strawberries are a classic choice for fruit skewers. They are sweet, juicy, and add a vibrant red color to the skewers.
- Pineapple: Fresh pineapple chunks bring a tropical touch to your fruit skewers. They are naturally sweet and offer a refreshing flavor.
- Grapes: Grapes, whether green, red, or black, are perfect for skewers. They are bite-sized, juicy, and come in various colors, adding a pop of brightness.
- Watermelon: Watermelon is a hydrating and delicious fruit choice for skewers. Cut the watermelon into small cubes or use a melon baller to create attractive shapes.
- Kiwi: Kiwi slices or cubes add a tangy and refreshing flavor to your fruit skewers. They also bring a vibrant green color to the mix.
- Mango: Mango chunks or slices are a tropical delight. They provide a sweet and juicy element to the skewers.
- Blueberries: Blueberries are small, sweet, and packed with antioxidants. They add a beautiful blue color to the skewers.
- Cantaloupe: Cantaloupe chunks or melon balls offer a mild and sweet flavor. They contribute an orange hue to the fruit skewers.
- Oranges: Slice oranges into small wedges or use a citrus peeler to create round segments. They provide a burst of citrus flavor and bright orange color.
- Raspberries and Blackberries: These juicy berries add a burst of tartness and rich colors like red and purple to the fruit skewers.
To assemble the fruit skewers, simply thread the fruits onto wooden or bamboo skewers, alternating between colors and varieties for an eye-catching display. You can also add a mint leaf at the end of each skewer for a refreshing touch. Fruit skewers are not only visually appealing but also a healthy and delicious snack option that kids will enjoy.
Rainbow Jello Cups
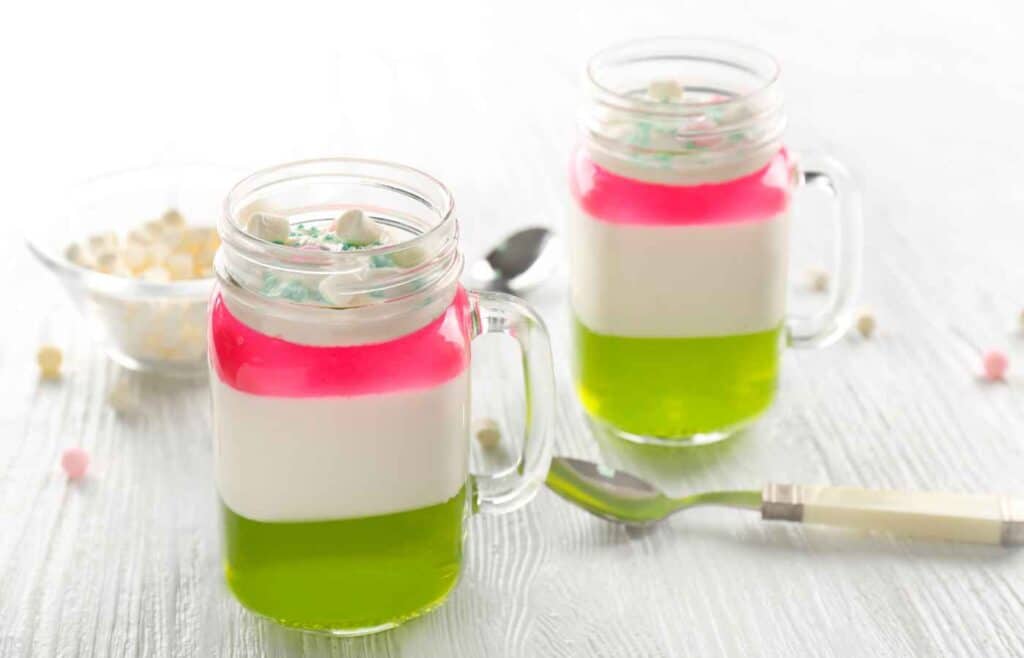
What better snack to brighten up a child’s birthday party than rainbow jello cups? And these definitely won’t break the bank. Here’s a recipe:
Ingredients:
- 3 boxes of flavored gelatin (choose different flavors and colors)
- Water (as per package instructions for each gelatin box)
- Whipped cream or whipped topping (optional)
- Sprinkles or fruit for garnish (optional)
Instructions:
- Prepare the first flavor of gelatin according to the package instructions. Dissolve the gelatin mix in boiling water, stirring until completely dissolved.
- Pour the prepared gelatin into individual cups, filling them about one-third of the way. Place the cups in the refrigerator and allow the gelatin to set according to the package instructions, usually around 1-2 hours.
- Once the first layer is set, prepare the second flavor of gelatin using the same process as before. Pour the second flavor on top of the set first layer, filling the cups another one-third of the way. Return the cups to the refrigerator to set.
- Repeat the process with the third flavor, filling the cups almost to the top. Place the cups back in the refrigerator for the final layer to set completely.
- Once all the layers are set, you can optionally top the Jello cups with whipped cream or whipped topping and garnish with sprinkles or fruit for added flair.
- Serve the layered Jello cups chilled and enjoy the delightful flavors and colors!
Feel free to get creative with different flavor combinations and colors to make the layered Jello cups even more visually appealing. You can also experiment with adding fruit pieces or even mixing in some yogurt for added texture and flavor. These layered Jello cups are sure to be a hit at any kids’ party or festive gathering!
Mini Hot Dogs

Mini hot dogs are an easy way to fill everyone’s belly! Here’s how to do prep them:
Ingredients:
- 1 package of cocktail sausages
- 1 package of refrigerated crescent roll dough
- Mustard and ketchup (for serving)
Instructions:
- Preheat your oven according to the instructions on the crescent roll dough package.
- Open the package of crescent roll dough and separate the individual triangles.
- Cut each triangle into smaller, narrower triangles to make them more manageable for wrapping the sausages.
- Take a cocktail sausage and wrap it with one of the smaller triangles of dough, starting from one end and rolling it up to the other end. Make sure the dough is sealed around the sausage.
- Repeat the process for the remaining sausages and dough.
- Place the wrapped sausages on a baking sheet lined with parchment paper, leaving a little space between each one.
- Bake the bite-sized hot dogs in the preheated oven for the time specified on the crescent roll dough package or until the dough is golden brown and cooked through.
- Once cooked, remove the bite-sized hot dogs from the oven and let them cool for a few minutes.
- Serve the bite-sized hot dogs with mustard and ketchup for dipping or drizzling.
Serve them with potato chips or cheese balls! These bite-sized hot dogs are perfect for kids’ parties, game nights, or any gathering where you want a fun and delicious finger food option. They are easy to make and are sure to be a hit with your little guests and adults alike.
Mini Nacho Cups
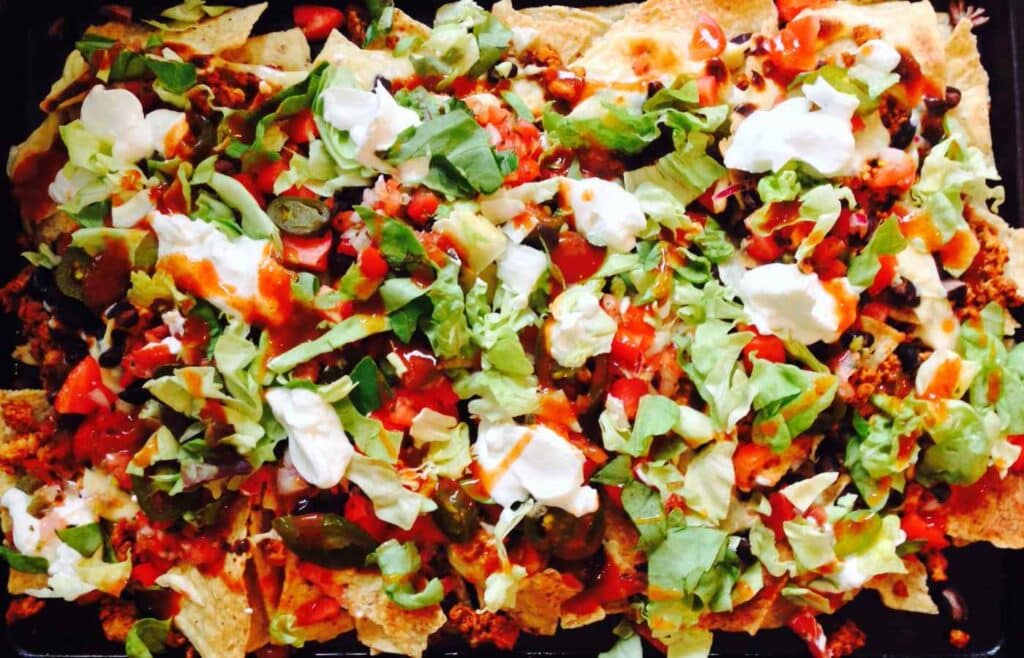
Creating a budget-friendly nacho platter is a fantastic idea for your child’s party or any casual gathering. Nachos are not only delicious but also customizable, allowing guests to enjoy their preferred combination of flavors.
Serve up a big platter of nachos for people to scoop into their individual cups.
Here are some suggestions for creating a budget-friendly nacho platter with chips, cheese, and toppings:
- Choose Affordable Chips:
- Tortilla Chips: Tortilla chips are a classic choice for nachos and are readily available at reasonable prices. Look for large bags or store-brand options to save money.
- Optimize Cheese Options:
- Shredded Cheese: Look for affordable shredded cheese varieties like cheddar, Monterey Jack, or a Mexican cheese blend. Buying in bulk or larger packages can be cost-effective.
- Nacho Cheese Sauce: If you prefer a smoother and creamier cheese option, consider purchasing nacho cheese sauce in jars or cans. It’s often more budget-friendly than specialty cheeses.
- Add Tasty and Economical Toppings:
- Refried Beans: Canned refried beans make a great addition to nachos. They add flavor, protein, and a creamy texture. Look for store-brand options for cost savings.
- Sliced Jalapeños: Pickled jalapeño slices provide a spicy kick to nachos without breaking the bank. Look for affordable jars or cans in the condiment aisle.
- Diced Tomatoes: Fresh tomatoes can add a burst of freshness to your nachos. Look for ripe and affordable tomatoes, or consider using canned diced tomatoes as an economical alternative.
- Chopped Green Onions: Green onions add a mild onion flavor and a pop of color to your nachos. They are generally inexpensive and can be used as a garnish.
- Black Olives: Canned sliced black olives are a popular and budget-friendly nacho topping. They provide a savory and briny element to the platter.
- Sour Cream: Sour cream can be an optional topping for added creaminess. Look for store-brand or generic options to save money.
To assemble the nacho platter, spread a layer of tortilla chips on a baking sheet or a large platter. Sprinkle shredded cheese or drizzle cheese sauce evenly over the chips. Then, add your desired toppings, such as refried beans, sliced jalapeños, diced tomatoes, chopped green onions, black olives, and a dollop of sour cream.
For added variety, you can also include other toppings like guacamole, salsa, or seasoned ground beef if they fit within your budget.
Bake the nachos in the oven until the cheese is melted and bubbly, usually around 5-10 minutes at 350°F (175°C).
A nacho platter won’t break your food budget, and it’s a crowd-pleasing option.
Savory Finger Foods
Keep your guests satiated with finger foods that they can easily serve themselves. Here are some great ideas that won’t break the bank:
Mini Pizzas
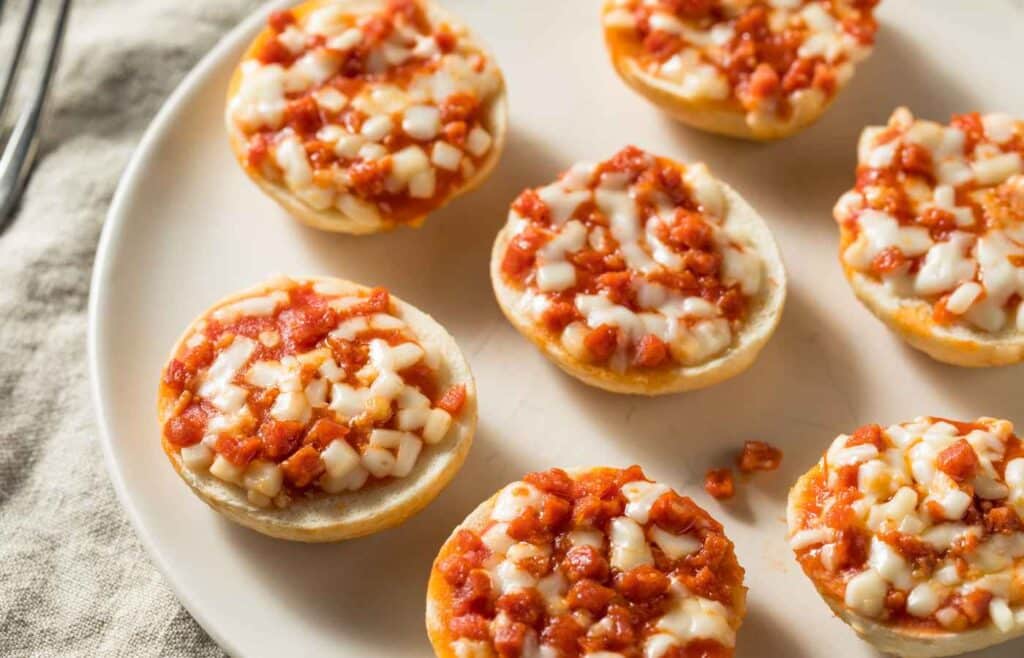
Make it a pizza party! Here’s how to do it on a budget:
Ingredients:
- English muffins
- Tomato sauce
- Shredded mozzarella cheese
- Assorted toppings (e.g., sliced pepperoni, diced bell peppers, sliced olives)
Instructions:
- Preheat your oven to 400°F (200°C) and line a baking sheet with parchment paper.
- Slice the English muffins in half horizontally, creating two rounds from each muffin.
- Place the English muffin halves on the prepared baking sheet with the cut side facing up.
- Spoon a tablespoon or two of tomato sauce onto each muffin half, spreading it evenly to the edges.
- Sprinkle shredded mozzarella cheese on top of the tomato sauce, covering it completely.
- Add your desired toppings, such as sliced pepperoni, diced bell peppers, or sliced olives.
- Place the baking sheet in the preheated oven and bake for about 10-12 minutes or until the cheese has melted and the edges of the muffins are golden brown.
- Remove the mini pizzas from the oven and let them cool slightly before serving.
These mini pizzas are perfect for kids’ parties because they’re easy to assemble and customize. You can get creative with the toppings, allowing each child to make their own personalized mini pizza. They’re not only delicious but also budget-friendly, making them a hit among both kids and parents. Enjoy!
Veggie Sticks with Dips
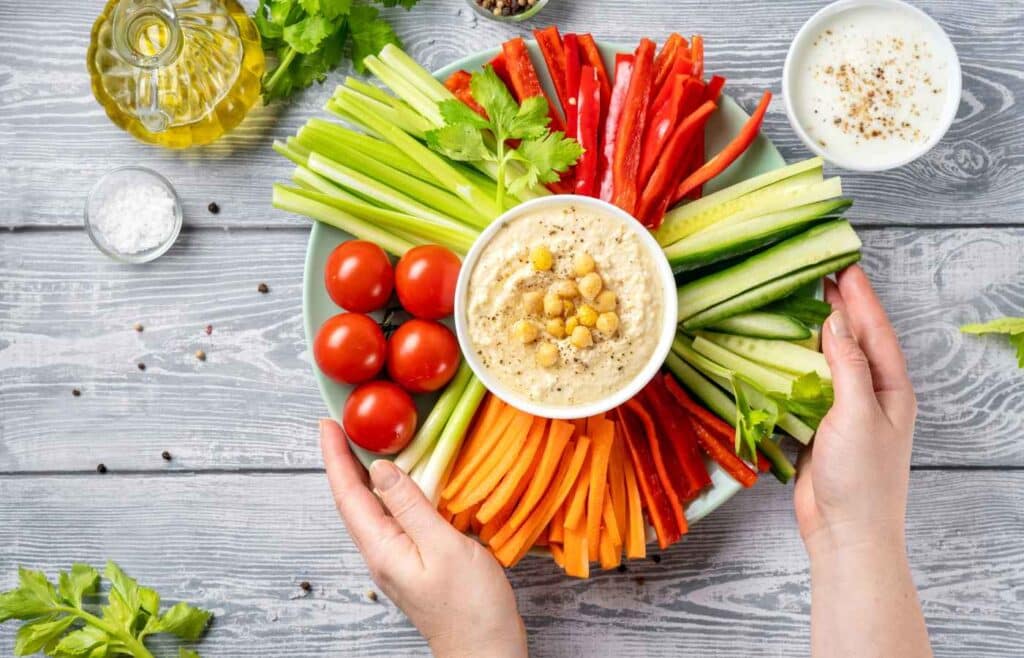
Carrot Sticks
Carrots are a classic choice for veggie sticks. They’re vibrant, crunchy, and packed with nutrients. Cut them into sticks or baby carrots for easy munching.
Dip Suggestions:
- Ranch Dip: Combine Greek yogurt, dried dill, garlic powder, onion powder, salt, and pepper for a creamy and tangy dip.
- Hummus: Opt for homemade hummus using canned chickpeas, garlic, lemon juice, tahini, olive oil, and salt. It’s nutritious and budget-friendly.
Cucumber Slices
Crisp cucumber slices add a refreshing element to the veggie platter. Peel them if desired, or leave the skin on for added texture.
Dip Suggestions:
- Tzatziki: Mix Greek yogurt, grated cucumber, minced garlic, lemon juice, dill, salt, and pepper. It’s a cool and flavorful dip that pairs perfectly with cucumber.
- Yogurt Herb Dip: Blend Greek yogurt with chopped fresh herbs like parsley, chives, dill, and a squeeze of lemon juice. It’s a light and tangy dip that complements the mild flavor of cucumbers.
Bell Pepper Strips
Colorful bell peppers not only provide a visual feast but also offer a sweet and crunchy taste. Choose a variety of bell peppers in different hues for a vibrant presentation.
Dip Suggestions:
- Creamy Avocado Dip: Mash ripe avocados and mix them with lime juice, minced garlic, salt, pepper, and a touch of Greek yogurt or sour cream. It’s a creamy and nutritious dip that pairs well with bell peppers.
- Salsa: Whip up a quick and budget-friendly salsa using chopped tomatoes, onions, jalapeños, cilantro, lime juice, salt, and pepper. It adds a zesty kick to bell pepper strips.
Broccoli and Cauliflower Florets
Broccoli and cauliflower florets are excellent choices for veggie sticks. They offer a mild flavor and a satisfying crunch.
Dip Suggestions:
- Yogurt Dill Dip: Combine Greek yogurt, chopped fresh dill, minced garlic, lemon juice, salt, and pepper. It’s a creamy and herby dip that complements the earthy taste of broccoli and cauliflower.
- Cheese Sauce: Prepare a simple cheese sauce by melting cheddar cheese with milk, a touch of flour, salt, and pepper. It adds a savory twist to the veggie sticks.
Remember to arrange the veggie sticks on a platter or in individual cups, offering a colorful and inviting display. These budget-friendly dips will enhance the flavors of the vegetables and keep the kids happily munching away at the party. Enjoy the healthy goodness!
Mini Sliders
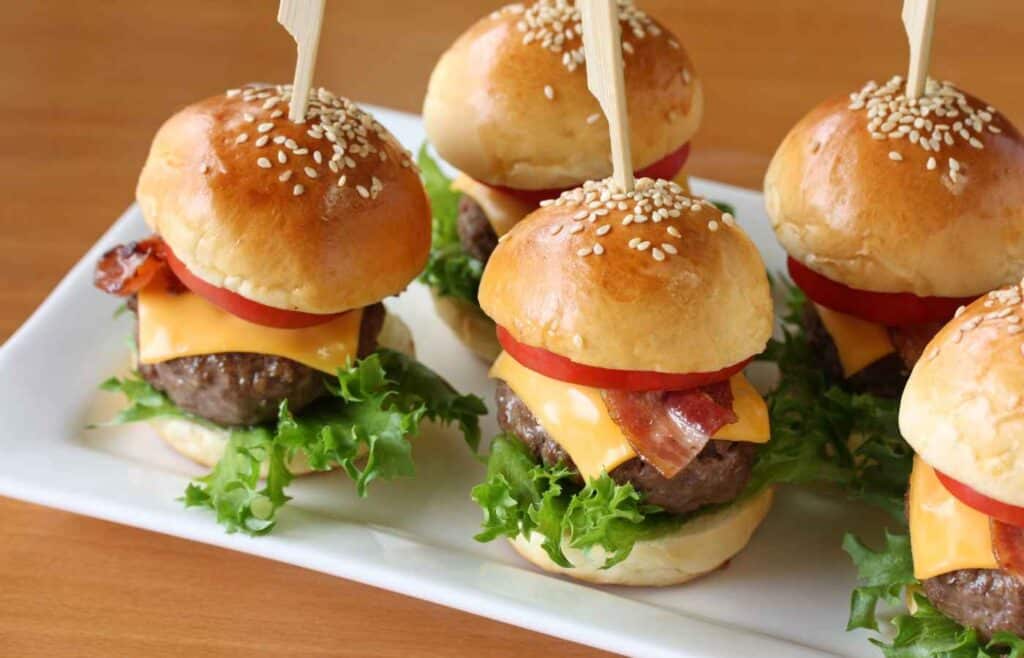
Mini sliders are a great choice to please a large crowd. Here are a few different options for your party table:
Mini Cheeseburgers
Ingredients:
- Ground beef
- Hamburger buns (mini-sized or cut regular buns into smaller rounds)
- Sliced cheese (such as cheddar or American)
- Lettuce, tomato slices, and pickles (optional)
- Ketchup and mustard
Instructions:
- Season the ground beef with salt and pepper, and shape it into small patties.
- Cook the patties on a grill, stovetop, or oven until they reach your desired level of doneness.
- Place a slice of cheese on top of each patty to melt.
- Slice the hamburger buns in half and lightly toast them.
- Assemble the mini burgers by placing a patty with melted cheese on the bottom half of each bun. Add lettuce, tomato slices, pickles, ketchup, and mustard if desired. Top with the other half of the bun.
Ham and Cheese Sliders
Ingredients:
- Dinner rolls or slider buns
- Sliced ham
- Sliced cheese (such as Swiss or provolone)
- Dijon mustard
- Mayonnaise
- Butter
Instructions:
- Preheat your oven to 350°F (175°C).
- Slice the dinner rolls or slider buns in half horizontally, creating a top and bottom layer.
- Spread a thin layer of Dijon mustard and mayonnaise on the bottom half of each roll.
- Layer sliced ham and cheese on top of the condiments.
- Place the top half of the rolls on the fillings to create mini sandwiches.
- Melt some butter and brush it over the top of the rolls.
- Place the sliders on a baking sheet and bake in the preheated oven for about 10-15 minutes or until the cheese is melted and the tops are golden brown.
Veggie Wraps

Ingredients:
- Tortilla wraps
- Hummus or cream cheese
- Assorted vegetables (such as sliced cucumbers, bell peppers, shredded carrots, and lettuce)
- Salt and pepper
Instructions:
- Lay a tortilla wrap on a clean surface.
- Spread a layer of hummus or cream cheese over the entire surface of the wrap.
- Arrange sliced vegetables on one side of the wrap, leaving space at the edges.
- Sprinkle the vegetables with a pinch of salt and pepper.
- Roll the tortilla tightly, starting from the side with the vegetables, until you have a compact wrap.
- Slice the wrap into smaller sections, creating mini veggie wraps.
These easy party appetizers are versatile and can be customized to suit different tastes. They’re a crowd-pleasing option for kids’ parties without breaking the bank. Get creative with toppings and condiments to add more flavor and variety. Enjoy!
Cheese and Crackers
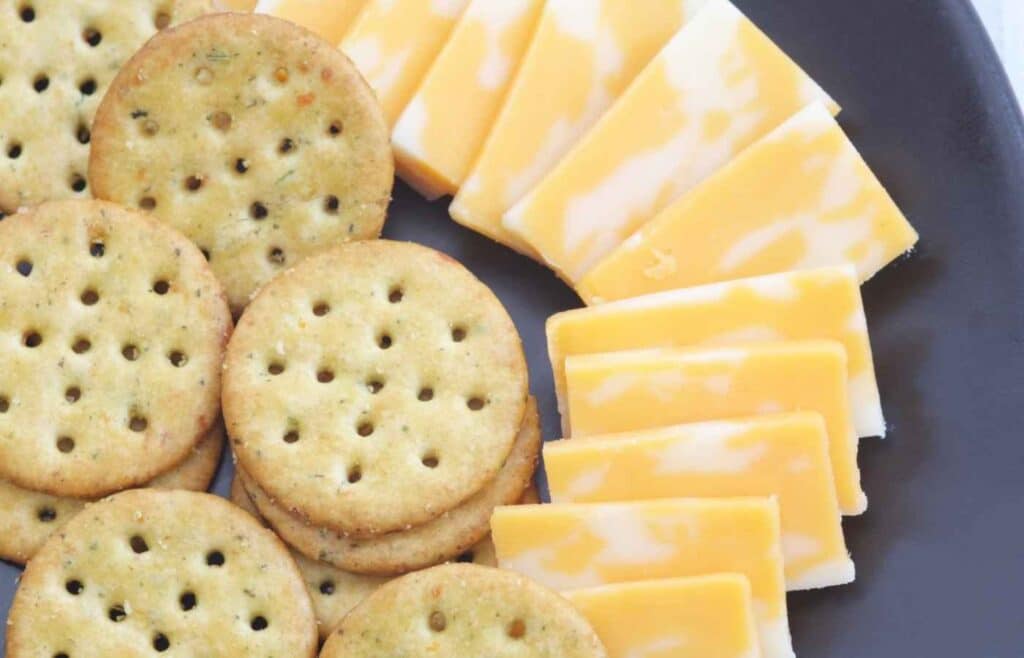
When it comes to creating a tasty snack with cheese and crackers for a kids’ party, you have a wide range of options to choose from. Here are some different types of cheese and affordable cracker options that will delight young palates:
- Cheese Varieties:
- Cheddar: Cheddar cheese is a classic choice that offers a sharp and tangy flavor. It’s versatile and pairs well with various cracker options.
- Mozzarella: Mozzarella cheese is known for its mild and creamy taste. It’s a great choice for kids who prefer a milder flavor.
- Colby Jack: Colby Jack is a combination of Colby and Monterey Jack cheeses. It offers a slightly sweet and nutty flavor, making it a popular choice among kids.
- Swiss: Swiss cheese has a distinctive nutty and slightly sweet flavor. It pairs well with a variety of crackers and adds a delicious touch to snack time.
- Affordable Cracker Options:
- Saltine Crackers: Saltine crackers are a budget-friendly option that provides a satisfying crunch. They work well with almost any type of cheese.
- Wheat Crackers: Wheat crackers, such as whole wheat or multigrain varieties, offer a slightly nutty flavor and a hearty texture. They complement different types of cheese.
- Rice Crackers: Rice crackers are gluten-free alternatives that have a light and crispy texture. They come in various flavors like plain, sesame, or seaweed, adding a unique twist to your cheese and cracker platter.
- Butter Crackers: Butter crackers, like Ritz or Club crackers, have a rich and buttery taste. They provide a delicate base for your chosen cheese.
To create an appealing snack, arrange a variety of cheese slices and different types of crackers on a platter. You can also add some colorful fruits like grapes or slices of apple for added freshness and visual appeal. Encourage kids to mix and match different cheese and cracker combinations to discover their favorite flavors. It’s a simple yet satisfying (read: protein rich) snack option that’s sure to be a hit at the party.
Chicken Skewers
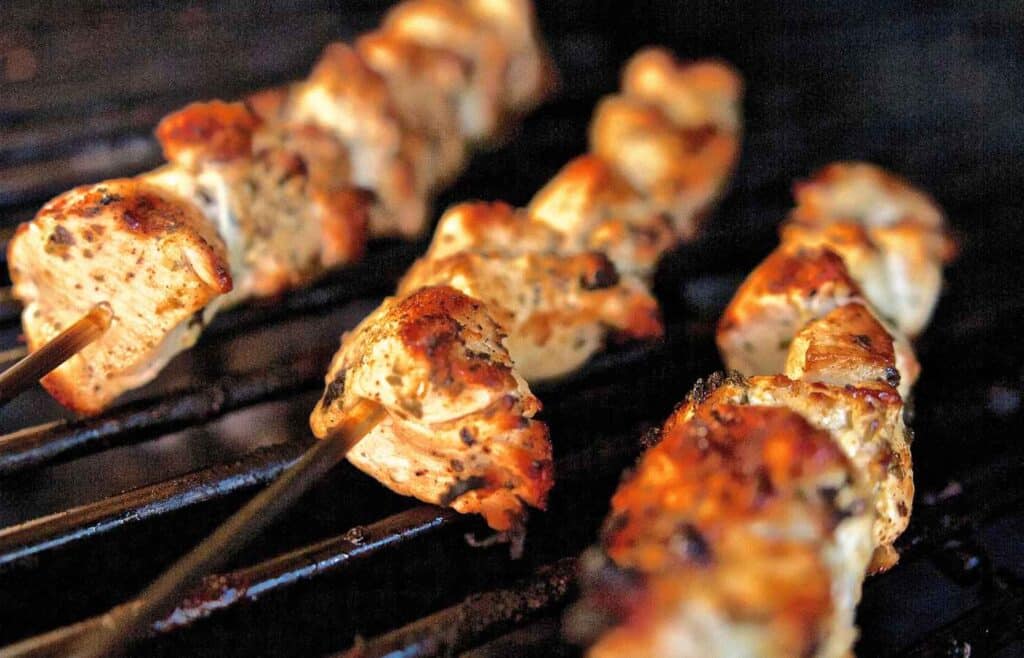
Ingredients:
- 1.5 lbs (680g) boneless, skinless chicken breasts or thighs, cut into bite-sized pieces
- 1 bell pepper (any color), cut into chunks
- 1 red onion, cut into chunks
- Cherry tomatoes
- Olive oil
- Salt and pepper
- Garlic powder
- Paprika
- Wooden skewers (pre-soaked in water for 30 minutes to prevent burning)
Instructions:
- In a bowl, combine the chicken pieces with olive oil, salt, pepper, garlic powder, and paprika. Mix well to ensure the chicken is evenly coated with the seasoning. Let it marinate for at least 15-20 minutes or refrigerate for a few hours to enhance the flavor.
- Preheat your grill or stovetop grill pan to medium-high heat.
- Thread the marinated chicken, bell pepper chunks, red onion chunks, and cherry tomatoes onto the pre-soaked wooden skewers, alternating between ingredients.
- Brush the grill grates or grill pan with a little olive oil to prevent sticking.
- Place the skewers on the preheated grill or grill pan and cook for about 10-12 minutes, turning occasionally, until the chicken is cooked through and the vegetables are tender.
- Remove the skewers from the grill and let them rest for a couple of minutes before serving.
These budget-friendly chicken skewers are not only delicious but also versatile. Feel free to experiment with different vegetables like zucchini, mushrooms, or even pineapple for added variety. You can serve them as a main dish with rice or as a finger food option at a kids’ party. They are sure to be a crowd-pleaser without stretching your budget.
Sweet Treats
No birthday celebration is complete without birthday cake!
But it’s always nice to have other sweet treats on hand for your children’s party. The good news? We’ve got some inexpensive ideas for desserts that are simple but creative.
Dirt Cups
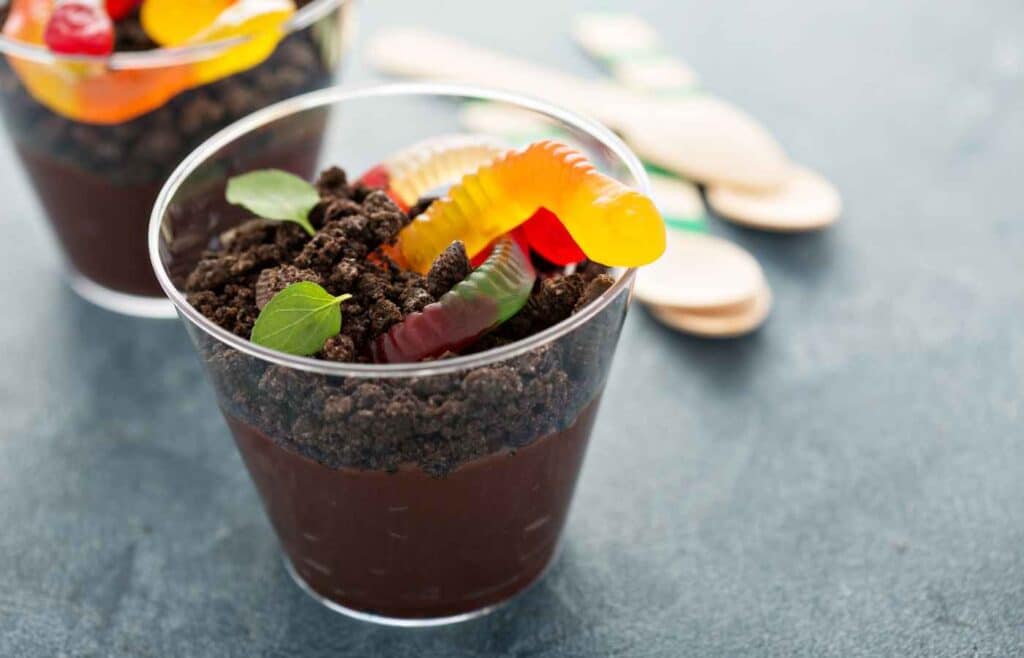
Dirt cup snacks are a fun and delicious treat that kids love. They typically consist of layers of chocolate pudding, crumbled cookies to resemble “dirt,” and various edible decorations. Here are a few ideas to make creative and tasty dirt cup snacks:
- Classic Dirt Cups
- Layer chocolate pudding and crumbled chocolate cookies (such as chocolate wafers or Oreo cookies) in individual cups or jars.
- Top with a generous sprinkling of cookie crumbs to create the “dirt” effect.
- Optional: Decorate with gummy worms or edible flowers on top for a playful touch.
- Garden-themed Dirt Cups
- Add a twist to the classic dirt cups by incorporating a garden theme.
- Before layering the chocolate pudding and cookie crumbs, bury edible “carrots” made from orange-colored candies (like jelly beans or candy-coated chocolates) in the pudding layer.
- Top with crushed cookie “dirt” and decorate with edible flowers or gummy worms.
- Monster Dirt Cups
- Make your dirt cups extra fun by turning them into monster-themed treats.
- Use green-tinted vanilla pudding or lime-flavored gelatin to create a vibrant green base resembling monster slime.
- Layer the pudding or gelatin with crumbled chocolate cookies.
- Decorate with candy eyes, gummy worms, or other monster-themed candies to bring your dirt cups to life.
- Beach-inspired Dirt Cups
- Give your dirt cups a beachy twist for a summer-themed treat.
- Use vanilla pudding instead of chocolate to represent sand.
- Layer the pudding and crumbled golden cookies (such as graham crackers) in cups or jars.
- Top with crushed cookies to resemble sand, and decorate with edible seashells or paper umbrellas to create a beachy vibe.
- Fruit-filled Dirt Cups
- Add a fruity twist to your dirt cups by incorporating layers of fresh fruit.
- Alternate layers of chocolate pudding or yogurt with sliced strawberries, bananas, or other favorite fruits.
- Top with cookie crumbs for the “dirt” effect and finish off with a dollop of whipped cream or a sprinkle of granola for added texture.
Feel free to get creative and customize your dirt cups based on the theme or preferences of the party. The key is to have fun and let your imagination run wild. Dirt cups are not only tasty but also offer an opportunity for playful and visually appealing presentation. Enjoy creating these whimsical treats with the kids and watch their faces light up with delight!
Cupcakes

Decorating cupcakes with affordable toppings can be a fun and budget-friendly way to add visual appeal to your treats. Use an array of rainbow sprinkles, chocolate sprinkles, confetti sprinkles, and sugar crystals.
Mix in some edible glitter, edible pearls, colored sugar, and edible flowers to really give your cupcakes a wow factor.
You can also use chocolate chips, fruit slices, cookie crumbs, marshmallows, and whipped cream to add more detail.
Top it off with glittery or patterned cupcake wrappers to really take them up a notch.
(One of the easiest ways to make it extra tasty? Add a scoop of ice cream!)
Rice Krispie Treats
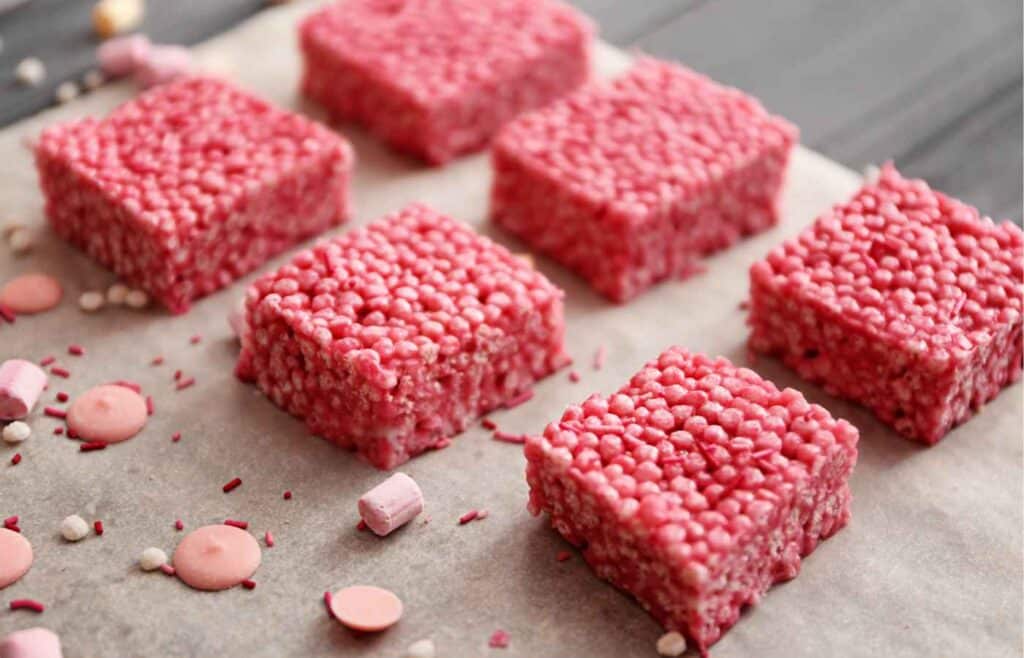
Your kids will absolutely love rice krispie treats. Here’s a simple recipe:
Ingredients:
- 6 cups Rice Krispies cereal
- 4 tablespoons unsalted butter
- 1 package (10 ounces) marshmallows
- Food coloring (optional)
- Sprinkles or edible decorations (optional)
Instructions:
- In a large saucepan, melt the butter over low heat.
- Add the marshmallows to the melted butter, stirring constantly until completely melted and smooth.
- If desired, add a few drops of food coloring to the marshmallow mixture and stir well to evenly distribute the color.
- Remove the saucepan from the heat and add the Rice Krispies cereal to the marshmallow mixture. Stir until the cereal is evenly coated.
- If you plan to shape the Rice Krispie treats, lightly grease a baking dish or pan and set it aside. If not shaping, you can skip this step.
- Pour the Rice Krispie mixture into the greased baking dish or pan. Use a greased spatula or your hands (lightly coated with butter or cooking spray) to press the mixture evenly into the dish or pan.
- If desired, decorate the top of the Rice Krispie treats with sprinkles or edible decorations by gently pressing them into the surface.
- Allow the Rice Krispie treats to cool and set at room temperature for at least 30 minutes. If shaping, you can place the dish or pan in the refrigerator to speed up the cooling process.
- Once the treats are set, use a knife or cookie cutters to shape them into desired shapes, such as squares, rectangles, or fun shapes like hearts or stars.
- Serve and enjoy!
Rice Krispie treats are a versatile and delightful treat that can be enjoyed by both kids and adults. You can get creative by shaping them into various forms with a cookie cutter or adding food coloring to match different themes or occasions. They are a perfect choice for parties, school events, or simply as a tasty snack.
Mini Donuts

Making mini donuts using inexpensive ingredients and colorful glazes is a wonderful way to create a fun and visually appealing treat. Whether you’re hosting a kids’ party, a brunch gathering, or simply indulging in a sweet snack, mini donuts are sure to be a hit. You can find simple recipes online and then decorate them with colorful glazes with a powdered sugar base.
Colorful Glaze Options:You can choose various colors for your glazes by using food coloring. Here are some ideas for colorful glazes:
They are not only delicious but also visually appealing, making them a delightful addition to any dessert table. Enjoy your homemade mini donuts and let your creativity shine!
DIY Fruit Popsicles

Here are two simple and refreshing recipes for homemade fruit popsicles using fresh fruit and affordable molds:
Strawberry Watermelon Popsicles
Ingredients:
- 2 cups diced watermelon
- 1 cup sliced strawberries
- 1 tablespoon honey (optional, depending on the sweetness of the fruits)
Instructions:
- Place the diced watermelon and sliced strawberries in a blender or food processor.
- Add honey if desired for added sweetness.
- Blend until you achieve a smooth and well-combined mixture.
- Pour the fruit mixture into popsicle molds, leaving a small gap at the top to allow for expansion.
- Insert popsicle sticks into each mold.
- Place the molds in the freezer and let them freeze completely, usually for about 4-6 hours or overnight.
- Once frozen, remove the popsicles from the molds by running warm water over the molds or gently twisting them.
- Enjoy the refreshing Strawberry Watermelon Popsicles!
Mixed Berry Yogurt Popsicles
Ingredients:
- 1 cup mixed berries (such as blueberries, raspberries, and blackberries)
- 1 cup plain yogurt (Greek or regular)
- 2 tablespoons honey (optional, depending on the sweetness of the berries)
Instructions:
- In a blender or food processor, combine the mixed berries, yogurt, and honey.
- Blend until the mixture is smooth and well-incorporated.
- Pour the mixture into popsicle molds, leaving a small gap at the top.
- Insert popsicle sticks into each mold.
- Place the molds in the freezer and let them freeze completely, usually for about 4-6 hours or overnight.
- Once frozen, remove the popsicles from the molds using the warm water or twisting method.
- Enjoy the creamy and tangy Mixed Berry Yogurt Popsicles!
These homemade fruit popsicles are not only delicious but also a healthier alternative to store-bought options. You can adjust the sweetness according to your taste preferences and experiment with different fruits or combinations. Enjoy these icy treats on a hot day or as a refreshing dessert anytime!
Cookie Sandwiches

Creating cookie sandwiches using store-bought cookies is a simple and delicious way to make a sweet treat. Here are some ideas for filling combinations to inspire your cookie sandwich creations:
- Classic Cream:
- Pair chocolate chip cookies with a creamy vanilla frosting or buttercream.
- Press the cookies together gently to create a delightful cream-filled sandwich.
- Peanut Butter Bliss:
- Match peanut butter cookies with a luscious peanut butter filling.
- You can use a store-bought peanut butter frosting or make a simple filling by combining creamy peanut butter with powdered sugar and a dash of vanilla extract.
- Berry Delight:
- Take sugar cookies or shortbread cookies and sandwich them with a tangy fruit jam or preserves.
- Choose your favorite flavors like strawberry, raspberry, or apricot to complement the buttery cookies.
- Minty Fresh:
- Combine chocolate cookies with a refreshing mint cream filling.
- You can use mint-flavored buttercream frosting or mix crushed mint candies with softened cream cheese for a delightful minty twist.
- S’mores Sensation:
- Use graham crackers or chocolate cookies and sandwich them with a fluffy marshmallow filling.
- You can use marshmallow fluff or whip up your own marshmallow filling by combining marshmallow cream with a little bit of softened butter.
- Caramel Indulgence:
- Match shortbread or oatmeal cookies with a rich caramel filling.
- You can use store-bought caramel sauce or make your own caramel buttercream by incorporating caramel sauce into a vanilla buttercream recipe.
- Cookies and Cream:
- Take chocolate or chocolate chip cookies and sandwich them with a creamy cookies and cream filling.
- Crush some sandwich cookies (like Oreos) and mix them into a vanilla frosting for a delightful cookies and cream experience.
Feel free to mix and match different types of cookies and fillings to create your own unique combinations. Experiment with different flavors, textures, and even add-ons like sprinkles or chocolate drizzle to make your cookie sandwiches even more enticing. Get creative and enjoy the delightful process of making and savoring these scrumptious treats!
Budget-Friendly Drinks
Fruit Punch
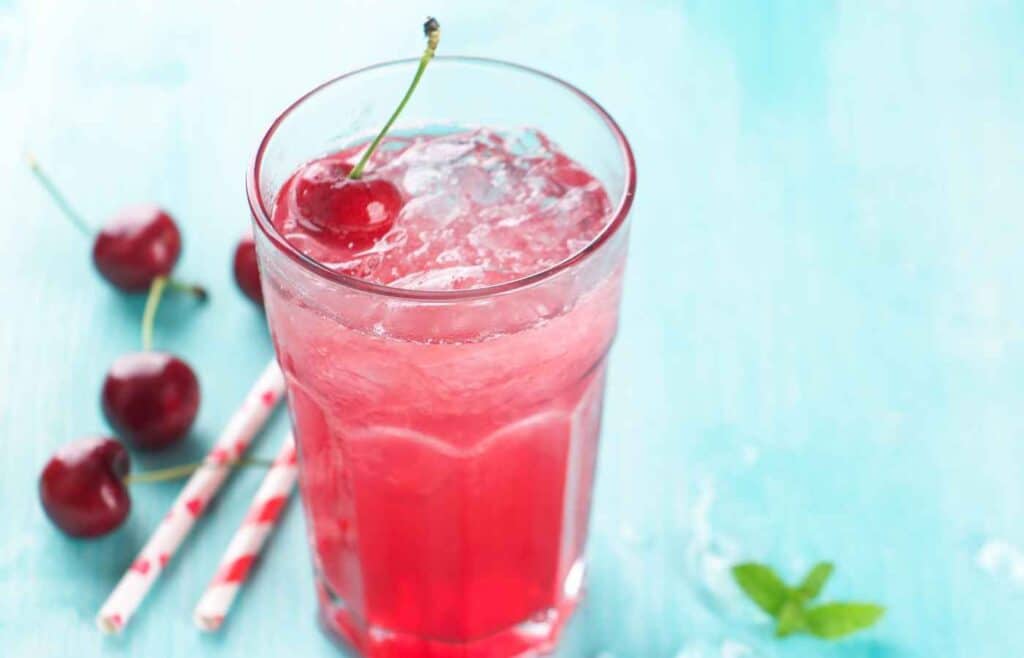
Here’s a simple recipe for making a refreshing fruit punch using affordable juices and soda:
Ingredients:
- 2 cups orange juice
- 2 cups pineapple juice
- 1 cup cranberry juice
- 1 liter lemon-lime soda (such as Sprite or 7UP)
- Ice cubes
- Slices of fresh fruit for garnish (optional)
Instructions:
- In a large pitcher, combine the orange juice, pineapple juice, and cranberry juice.
- Stir the juices together until well mixed.
- Place the pitcher in the refrigerator and let it chill for at least 1 hour to allow the flavors to blend.
- Just before serving, add the lemon-lime soda to the pitcher. Stir gently to combine.
- Fill glasses with ice cubes and pour the fruit punch over the ice.
- If desired, garnish each glass with a slice of fresh fruit, such as orange slices or berries.
- Serve the refreshing fruit punch immediately and enjoy!
This fruit punch is a crowd-pleasing beverage that can be enjoyed at parties, picnics, or any gathering. The combination of orange, pineapple, and cranberry juices gives it a delightful balance of sweet and tangy flavors, while the fizzy soda adds a refreshing effervescence. Feel free to adjust the quantities of the juices and soda according to your taste preferences. Cheers to a delicious and budget-friendly fruit punch!
DIY Smoothie Bar
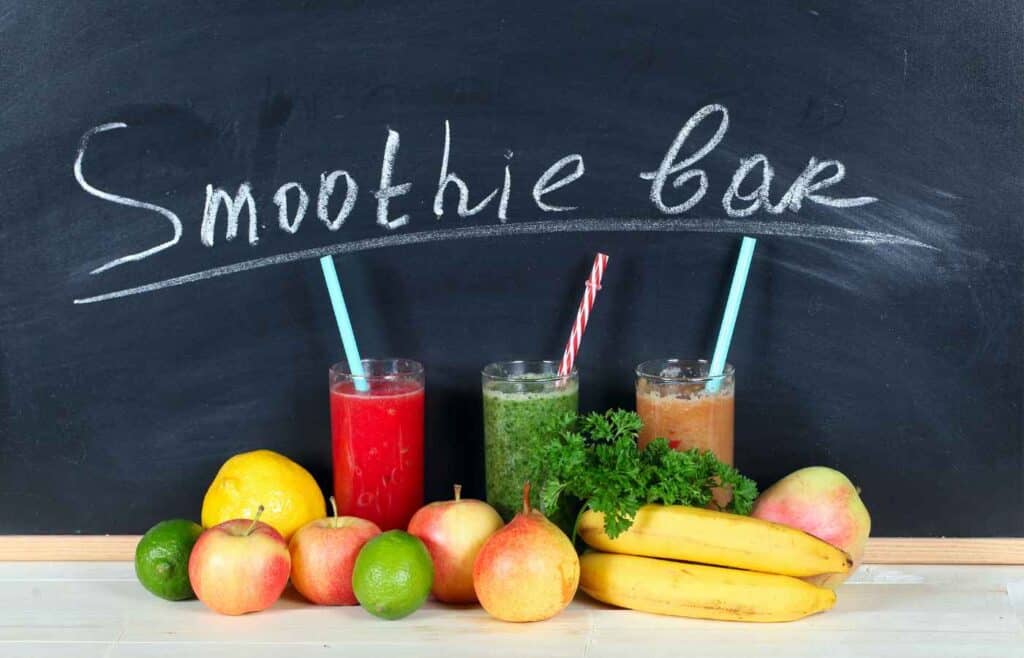
Setting up a self-serve smoothie station is a fantastic idea that allows guests to customize their own delicious and nutritious drinks. It creates a fun and interactive experience, especially for parties, brunches, or gatherings where people can explore different flavor combinations.
Setting up a self-serve smoothie station is relatively easy. Here’s what you’ll need:
- A variety of fresh fruits such as berries, bananas, mangoes, peaches, and pineapple, chopped or sliced for easy blending.
- Different flavored yogurts, including both regular and non-dairy options, for guests to choose from.
- Blenders or smoothie machines for guests to blend their chosen ingredients.
- Additional add-ins like honey, granola, chia seeds, or nut butter for guests to customize their smoothies further.
- Cups, straws, and napkins for serving.
Display the fruits, yogurts, and add-ins in an inviting and organized manner, along with clear instructions on how to use the blenders or smoothie machines. Consider providing recipe cards or suggestions for flavor combinations to inspire guests.
A self-serve smoothie station adds a refreshing and healthy element to any gathering. It allows guests to embrace their creativity, enjoy personalized smoothies, and engage in a delightful culinary experience. Cheers to a successful and enjoyable smoothie station!
Flavored Water
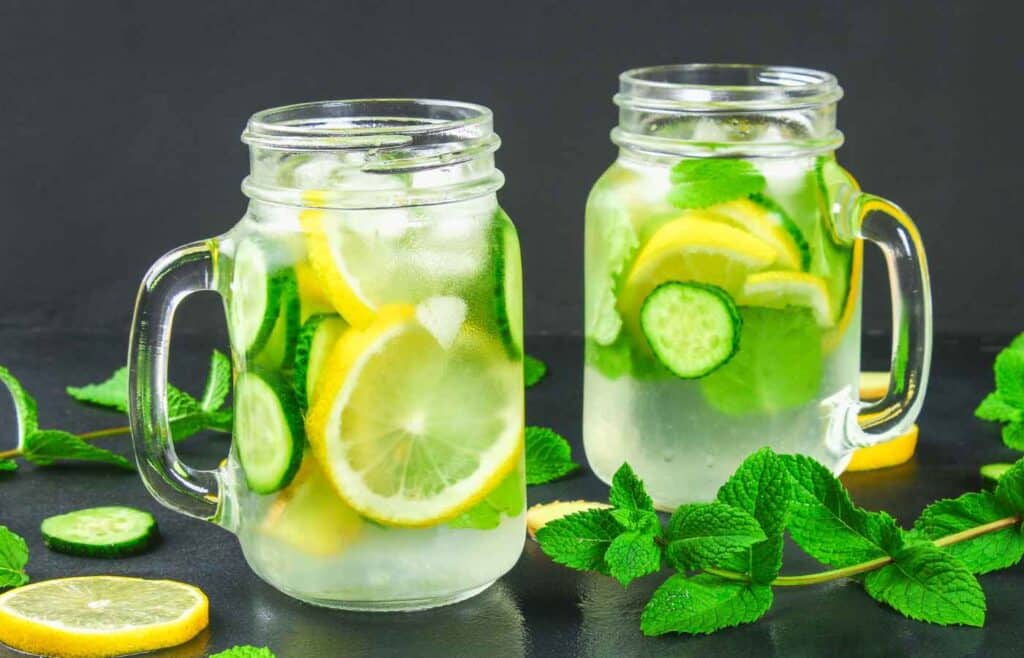
Infusing water with fruits and herbs is a wonderful way to add natural flavors and enhance the taste of plain water. It’s a budget-friendly and healthy drink option that is not only refreshing but also visually appealing. Here are some ideas for infusing water with fruits and herbs:
- Citrus Burst:
- Slice lemons, limes, and oranges into thin rounds.
- Add a few sprigs of fresh mint or basil.
- Place the citrus slices and herbs in a pitcher or water bottle filled with water. Let it infuse for at least 1-2 hours before serving.
- Berry Bliss:
- Combine a handful of fresh berries like strawberries, raspberries, or blueberries.
- Add a few sprigs of rosemary or thyme for an herbal twist.
- Gently muddle the berries and herbs to release their flavors, then place them in a pitcher or water bottle filled with water. Let it infuse for a few hours before serving.
- Tropical Paradise:
- Slice fresh pineapples, mangoes, and kiwis into chunks.
- Add a handful of coconut flakes or a few leaves of fresh basil.
- Place the tropical fruits and herbs in a pitcher or water bottle filled with water. Let it infuse in the refrigerator for a couple of hours or overnight for a stronger flavor.
- Cucumber Mint Refresher:
- Thinly slice a cucumber.
- Add a handful of fresh mint leaves.
- Place the cucumber slices and mint leaves in a pitcher or water bottle filled with water. Allow it to infuse for at least 1 hour before serving.
- Watermelon Basil Splash:
- Cut fresh watermelon into cubes or use a melon baller for smaller pieces.
- Tear a few basil leaves and add them to the watermelon.
- Place the watermelon cubes and basil leaves in a pitcher or water bottle filled with water. Let it infuse for a few hours in the refrigerator before serving.
Feel free to experiment with different combinations of fruits and herbs to find your favorite flavors. Adjust the quantity of ingredients based on your taste preferences and the size of your water container. Remember to thoroughly rinse the fruits and herbs before using them.
Infused water not only provides a refreshing alternative to sugary drinks but also offers the added benefits of vitamins and minerals from the fruits and herbs. It’s a simple and economical way to stay hydrated while enjoying the natural flavors of fruits and herbs. Cheers to a healthy and delicious hydration option!
Mocktails

Sunshine Splash
Ingredients:
- 1/2 cup orange juice
- 1/4 cup pineapple juice
- 1/4 cup cranberry juice
- Splash of grenadine syrup (optional, for added sweetness)
- Ice cubes
Instructions:
- In a tall glass, pour the orange juice, pineapple juice, and cranberry juice.
- Add a splash of grenadine syrup if desired, for added sweetness and a beautiful layered effect.
- Stir gently to mix the flavors.
- Fill the glass with ice cubes.
- Garnish with a small slice of orange or pineapple if desired. Sip and enjoy the vibrant flavors!
Berry Sparkler
Ingredients:
- 1/2 cup mixed berries (strawberries, blueberries, raspberries)
- 1 tablespoon lemon juice
- 1 tablespoon honey or agave syrup
- Ginger ale or lemon-lime soda
- Ice cubes
Instructions:
- In a blender, combine the mixed berries, lemon juice, and honey (or agave syrup).
- Blend until smooth and well combined.
- Strain the mixture to remove any seeds or pulp, if desired.
- Fill a glass with ice cubes.
- Pour the berry mixture into the glass, filling it about halfway.
- Top it off with ginger ale or lemon-lime soda.
- Stir gently and garnish with a fresh berry or lemon slice. Savor the berrylicious goodness!
Feel free to get creative and adjust the recipes according to your taste preferences. You can also add decorative touches such as colorful straws, fruit skewers, or umbrellas for a festive presentation. These mocktails are perfect for parties, gatherings, or simply enjoying a refreshing beverage any time. Cheers to delightful and budget-friendly mocktails!
We hope you’ve enjoyed this extensive list of 50 kids’ party food ideas that are not only delicious but also budget-friendly.
From savory bites to sweet treats, we’ve covered a wide range of options to cater to different tastes and preferences.
We encourage you to get creative and adapt these ideas to suit your own preferences and budgets. Feel free to mix and match, try new flavors, and add your personal touch to these party food ideas.
Remember, it’s the thought, effort, and love that goes into planning that truly make a party special.
So, whether you’re organizing a birthday bash, a themed celebration, or a simple get-together, we hope these 50 kids’ party food ideas have sparked your imagination and inspired you to create a wonderful event.
Cheers to hosting a fabulous and budget-friendly party filled with delicious food and happy memories!
Related Posts:
50 Best Indoor Activities For Your Toddler’s Birthday Party
50 Creative Birthday Party Ideas for Your 3-Year-Old
50 Outdoor Birthday Party Ideas for Your 4-Year-Old
50 Fun Birthday Party Activities for Your 5 Year Old
50 Fun Activities for Your 7 Year Old’s Birthday Party
50 Fun Activities for Your 8 Year Old’s Birthday Party
50 Fun Activities for Your 10 Year Old’s Birthday Party
50 Fun Activities for Your 11 Year Old’s Birthday Party
50 Best Birthday Activities for a 12 Year Old
50 Best Birthday Party Activities for a 13 Year Old
50 Fun Activities for a Girl’s Birthday Party
50 Fun Activities for a Boy’s Birthday Party
50 Best Birthday Party Activities for Kids
50 Best Sleepover Activities for 11 Year Olds
Calie Herbst, Editor-in-Chief of Milwaukee With Kids, has spent over a decade combining her experiences as a parent of three to create a hub for Milwaukee’s family adventures.
Her decade-long teaching career in Milwaukee Public Schools and academic background, including a Master’s in Teaching from Marquette University and dual B.A.s in Sociology and Spanish from the University of Wisconsin – Madison, fuel her passion for inclusive and engaging family content.
Calie is also a recognized voice in local media, contributing to WISN Channel 12 News, WTMJ Wisconsin Morning News, Fox 6’s Real Milwaukee, and B93.3.
Discover more about Calie’s journey and editorial approach on her About Page and Editorial Policy Page.


