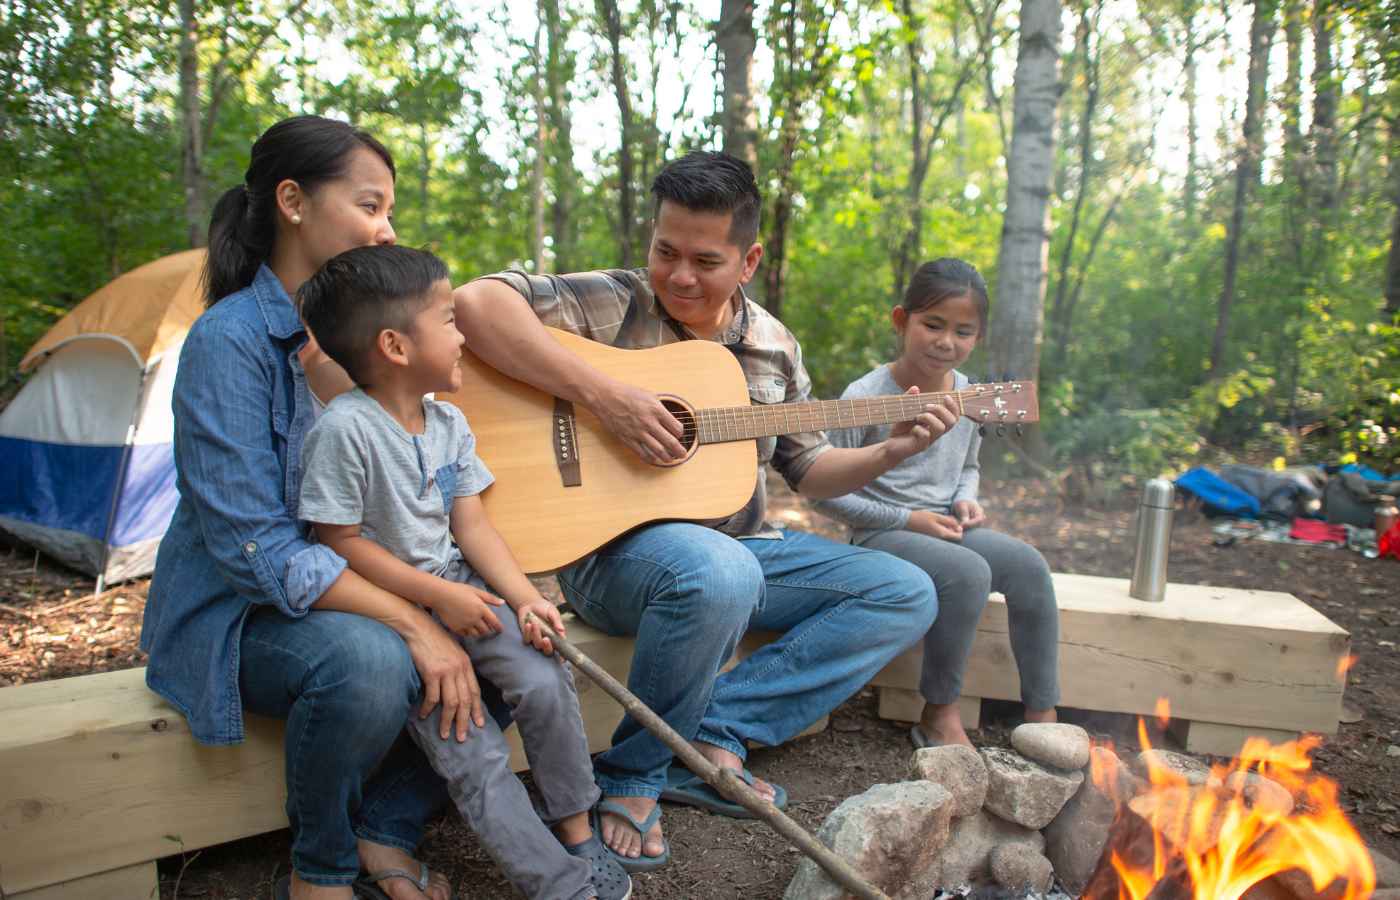
Camping trips provide the perfect opportunity for families to bond, unplug from technology, and immerse themselves in nature.
As the warm summer breeze beckons, it’s time to start planning a memorable camping adventure for your family.
But you might be wondering, “what are we going to do out there?” Can you really fill all that time and make it fun for all ages?
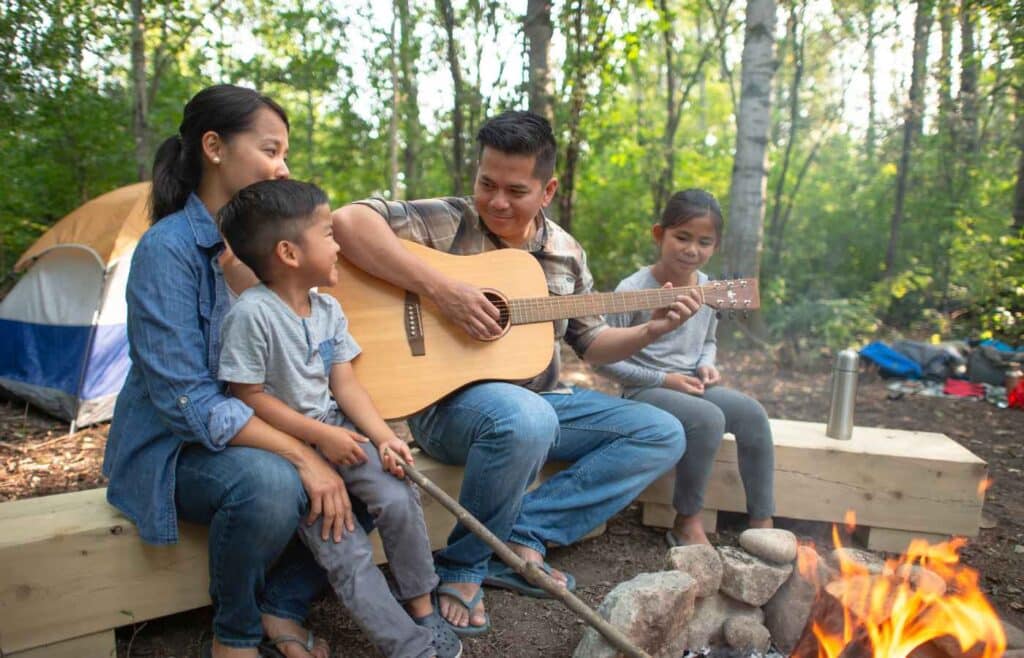
The answer is absolutely YES!
We have compiled a list of the 50 fun camping activities that your kids will absolutely love on your next trip. Whether you are backyard camping or heading to a state or national park, we’ve got you covered.
From classic outdoor games to creative nature crafts, there’s something here to spark joy and create lasting memories for the whole family.
So, grab your sleeping bag and camping gear and get ready for a good dose of fresh air and camping fun.
1. Build a Shelter
Building a nature shelter with kids on a camping trip is an exciting and hands-on activity that connects them to their surroundings and fosters a sense of adventure.
Find a suitable spot in the woods or near trees, using fallen branches, leaves, and other natural materials to construct a shelter. Explain the importance of not damaging living trees or plants and avoiding hazardous areas or materials.
They can create a lean-to structure by propping branches against a tree trunk or using a large log as a ridgepole. Alternatively, they can construct a teepee shape by leaning branches together and securing them with vines or rope. Show them how to securely interlock branches, weave vines, or tie ropes to hold the structure together.
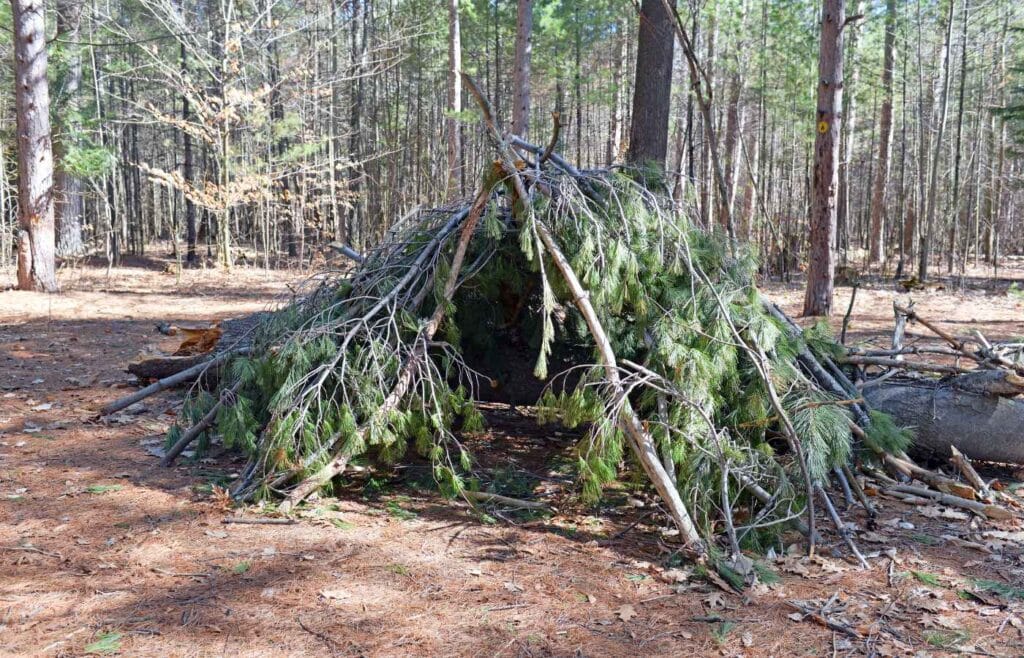
Once the basic structure is complete, encourage the kids to add insulation to their shelter. They can use leaves, moss, or pine needles to create a layer of insulation on the inside of the shelter, providing warmth and comfort.
Have the kids carefully test the stability of their shelter by gently pushing or shaking it. Reinforce any weak areas or adjust the structure if needed to ensure it can withstand light wind or rain.
Let the kids get creative by decorating their nature shelters with additional natural materials like flowers, ferns, or rocks. This adds a personal touch and makes the shelters more inviting.
After completing the shelters, encourage the kids to explore and use their creations. They can relax inside, tell stories, or engage in imaginative play. It’s so much fun!
At the end of the camp trip, remind the kids to respect nature and leave no trace. When they’re done with the shelters, instruct them to dismantle and scatter the materials back into the surrounding area, returning everything as they found it.
2. Gather Firewood
First things first, you’ll need firewood for your campfire! The entire family can help with this essential activity, even young kids.
If it’s their first time collecting firewood, it’s important to teach them about different types of firewood and their suitability for starting and maintaining a fire:
- Tinder: Tinder refers to the smallest and driest materials used to ignite a fire. It catches fire easily and quickly. Examples are Dry leaves, pine needles, small twigs, birch bark, or shredded paper. Encourage the kids to collect small, dry materials from the ground, such as fallen leaves and twigs. Look for dead plant matter that easily crumbles when touched.
- Kindling: Kindling consists of slightly larger pieces of wood that provide a sustained flame once the tinder has ignited. Examples are thin branches, small sticks, or dry branches with a diameter of around 1-2 centimeters. Instruct the kids to look for dry branches or sticks on the ground that are not too thick. They can break these into smaller pieces if necessary. Remind them to avoid live or green branches.
- Fuelwood: Fuelwood refers to larger pieces of wood that provide a long-lasting burn to sustain the fire. Examples are logs or thicker branches with a diameter of more than 2 centimeters. Guide the kids to search for fallen logs or larger branches. It’s important to avoid taking wood from standing trees or cutting live vegetation. Look for dry and seasoned wood that will burn well.

When gathering firewood with kids, it’s crucial to teach them about sustainable practices and leave no trace principles. Here are a few additional tips to keep in mind:
- Remind them to only gather as much firewood as necessary to minimize waste and avoid depleting the local resources.
- Encourage them to collect wood from the surrounding area rather than carrying it from a far distance.
- Teach them to respect the natural environment and avoid damaging plants or disturbing wildlife habitats while gathering firewood.
- Emphasize the importance of safety, such as wearing closed-toe shoes, using gloves when handling sharp objects, and watching out for potential hazards.
Pro Tip: On rainy days, you’ll want to cover up your firewood so it doesn’t get wet.
3. Build a Campfire
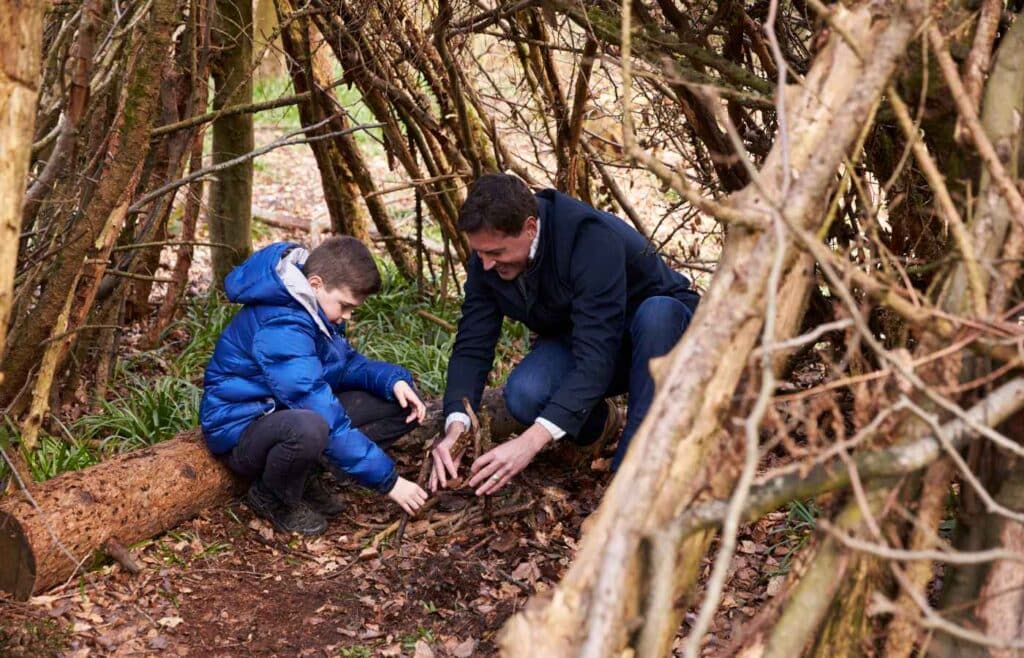
Building a fire with kids on a camping trip is a great activity that can be fun and educational. Here’s a simplified guide to help you:
- Choose a safe location: Find a designated fire pit or clear an area free of flammable materials. Ensure it’s away from tents, trees, and other hazards.
- Gather firewood: (See #2) Together with the kids, collect firewood in various sizes. Look for dry twigs (tinder, no thicker than a matchstick), small branches (kindling), and larger logs (fuel). Emphasize the importance of using fallen wood and not breaking branches from live trees.
- Prepare the fire pit: Clear any debris or vegetation from the fire pit area. Create a ring of rocks to contain the fire and prevent it from spreading.
- Arrange the firewood: Start with a base of small twigs and crumpled paper or dry leaves. Place larger sticks in a teepee shape over the base, leaving space for airflow. Gradually add larger logs as the fire builds.
- Ignite the fire: Use matches, a lighter, or other fire-starting tools to ignite the paper or dry leaves in the center of the teepee. Encourage the kids to be cautious and keep a safe distance from the flames.
- Add more wood: As the camp fire grows, gradually add larger pieces of firewood. Make sure to leave enough space between the logs for oxygen to reach the fire and keep it burning.
- Supervise and teach safety: While the fire is burning, closely supervise the kids and educate them about fire safety. Teach them to never leave the fire unattended, keep a safe distance, and avoid playing or running near it. Younger kids need almost constant supervision, while older kids can have a little more independence.
- Enjoy the fire: Sit around the fire with the kids, sharing stories, singing songs, or roasting marshmallows for a tasty treat. Encourage them to appreciate the warmth and beauty of the fire while respecting its power.
- Extinguish the fire: When you’re ready to put out the fire, pour water over the flames, starting from the outer edges and working inward. Stir the ashes and add more water until everything is cool to the touch. Ensure the fire is completely extinguished before leaving the area.
- Leave no trace: Teach the kids the importance of leaving the fire pit area clean. Remove any remaining debris, and scatter the cooled ashes and firewood remnants in a wide area away from the campsite.
Building a fire with kids on a camping trip provides a valuable opportunity to teach them about fire safety, responsibility, and respect for nature. Enjoy this engaging and memorable experience while fostering a love for outdoor adventures!
4. Cook Hot Dogs
Take campfire cooking to the next level by preparing some easy camping meals over the open flame. Hot dogs on a stick is a good option, and so are foil-wrapped meals and grilled sandwiches. You can involve everyone in the cooking process and enjoy the delicious results together.
5. Tell Campfire Stories
Gathering around the campfire and sharing stories is a cherished tradition during camping trips. Get comfy in your camp chairs and spend quality time telling ghost stories, folklore and legends, adventure stories from your own life experience, funny anecdotes, animal tales, moral stories, and more.
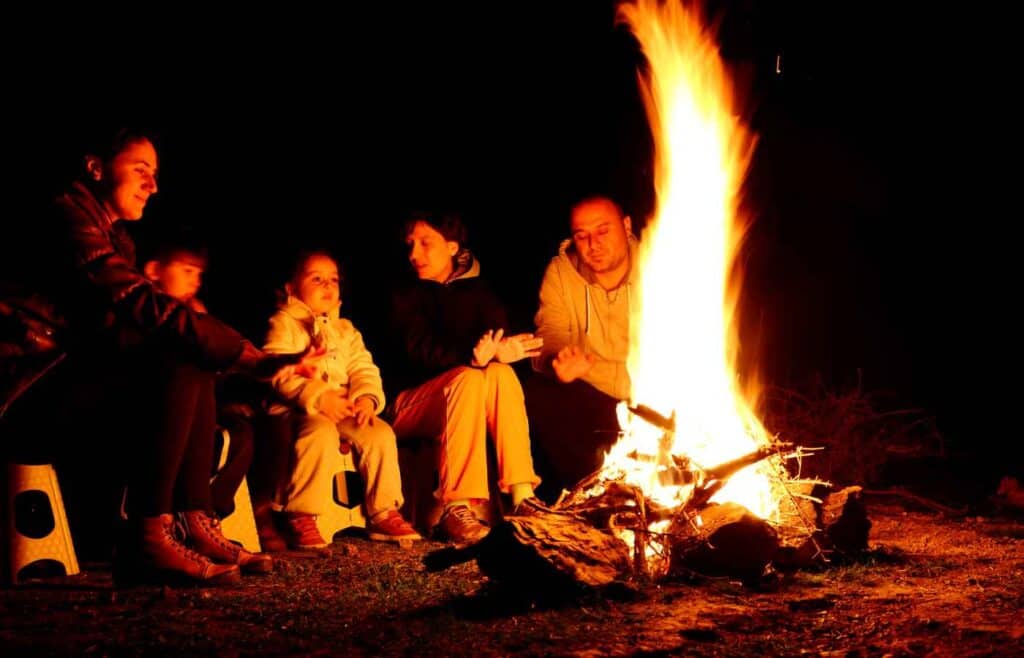
Enjoy the magic of storytelling as you gather around the campfire, creating memorable moments and fostering a sense of togetherness.
6. Make S’mores
Making s’mores is a classic, must-do activity on your next camping trip. You’ll need graham crackers, marshmallows, and chocolate bars. Build a campfire and allow it to burn down to a bed of hot coals. Ensure adult supervision and adhere to fire safety guidelines. Have each child find a roasting stick or skewer and show them how to safely toast their marshmallows over the fire. Tell them if it catches on fire they should calmly blow it out, rather than shake it around. Demonstrate what you mean.

Encourage them to rotate the marshmallow for even browning. Once the marshmallows are golden and gooey, show the kids how to carefully place them on a graham cracker. Add a piece of chocolate on top and sandwich it with another graham cracker.
Enjoy the gooey, sweet, and delicious treat together! Let the kids savor the flavors and experience the joy of eating s’mores in the great outdoors. Remember to clean up after yourselves and properly extinguish the fire before leaving the campsite.
7. Sing Campfire Songs
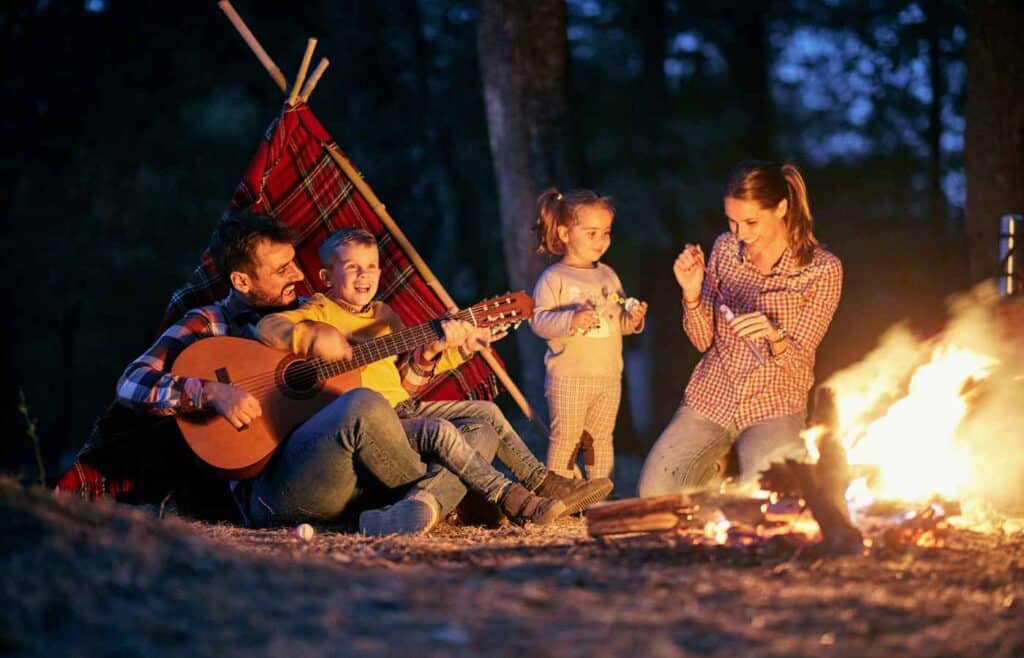
Singing campfire songs with kids is a joyful and interactive activity during camping trips. Here are a few popular campfire songs that are perfect for singing along with children:
- “Down by the Bay”: A fun and silly song where kids can join in and make up their own rhymes. Example verse: “Down by the bay, where the watermelons grow, back to my home, I dare not go. For if I do, my mother will say, ‘Did you ever see a bear combing his hair?'”
- “The Ants Go Marching”: A catchy song that allows kids to sing and act out the marching ants. Example verse: “The ants go marching one by one, hurrah, hurrah! The ants go marching one by one, hurrah, hurrah! The ants go marching one by one, the little one stops to suck his thumb, and they all go marching down to the ground to get out of the rain, boom, boom, boom!”
- “Boom Chicka Boom”: A call-and-response song that encourages kids to repeat and imitate different vocal styles. Example verse: “I said a boom chicka boom, I said a boom chicka boom. I said a boom chicka rocka chicka rocka chicka boom. Uh huh, oh yeah!”
- “Kumbaya”: A classic campfire song that is perfect for creating a peaceful and harmonious atmosphere. Example verse: “Kumbaya, my Lord, kumbaya. Kumbaya, my Lord, kumbaya. Kumbaya, my Lord, kumbaya. Oh Lord, kumbaya.”
- “The Wheels on the Bus”: A popular children’s song that can be adapted to incorporate campfire and camping themes. Example verse: “The campfire at the campsite goes crackle, crackle, crackle. Crackle, crackle, crackle. Crackle, crackle, crackle. The campfire at the campsite goes crackle, crackle, crackle, all day long.”
Singing campfire songs with kids creates a lively and memorable atmosphere, fostering a sense of togetherness and fun. Don’t forget to bring along some musical instruments for added fun.
8. Play Charades
Campfire charades is a lively and entertaining game to play during camping trips. Bring everyone together around the campfire and explain the rules of charades. Select one person to be the charades master. This person will come up with words or phrases for the players to act out. The charades master can write down a list of words or phrases on small pieces of paper. These can be camping-related words, nature-themed terms, or anything that suits the camping atmosphere.
The charades master will pick a prompt and act it out without speaking while the other players try to guess what it is. They can use gestures, facial expressions, and movements to convey the meaning. The players shout out their guesses, and the first person to correctly guess the prompt becomes the next charades master. You can keep track of the scores or simply play for fun.
Campfire charades is a fantastic way to engage everyone, create laughter, and enjoy the cozy campfire ambiance. It promotes creativity, communication skills, and teamwork among the players. Have fun guessing and acting out various prompts while enjoying the warmth of the campfire!
9. Would You Rather Questions
Present a series of “Would you rather” scenarios and let each person choose their preference. This game sparks lively debates and reveals interesting insights.
10. Flashlight Games
There’s something about the glow of a flashlight in the dark that captures kids’ imaginations and inspires all sorts of fun games and activities. Whether your kids are budding scientists, avid adventurers, or just love to goof around, there are plenty of ways to use flashlights to make playtime even more exciting.
Here are 25 Flashlight Games For Kids for your next camping trip.
11. Two Truths and a Lie
Each person takes turns sharing two true statements and one false statement about themselves. The group tries to identify the lie, fostering conversation and getting to know each other better.
You could also start a Storytelling Chain: Start a story with a few sentences, then each person adds a few more sentences to continue the narrative. Let the tale evolve in unexpected and imaginative ways.
12. Campfire reflections
Use the campfire as a cozy setting for reflecting on the day’s adventures. Ask everyone to share their “rose” from the day (their best part of the day), their “thorn” (the part they like the least), and their “bud’ (what they’re excited about for the next day). Share highlights, funny moments, or personal thoughts. It’s a great way to bond and create a sense of togetherness.
13. Stargazing
Camping in the great outdoors, away from all the city lights, is the perfect time to stargaze with your kids. Kids of all ages will love this relaxing nighttime activity.
Stargazing fosters a sense of wonder, ignites their curiosity about the universe, and helps them appreciate the beauty and vastness of the night sky. It’s a perfect opportunity to bond with nature and create lasting memories.

Choose a clear night, and avoid nights with a full moon, as it can make it harder to see fainter stars and celestial objects. Find a dark location where light pollution is minimal, like a clearing in the woods, a field, or a designated stargazing area in the camping site.
Set up comfortable seating arrangements such as blankets, reclining chairs, or sleeping bags. It’s important to be cozy and relaxed to fully enjoy the experience.
If needed, you can use stargazing apps or guidebooks to learn more about the stars, constellations, and other celestial objects. These resources can provide additional information, facts, and trivia about the night sky.
Take time to reflect on the experience and discuss any questions or observations the kids have. Encourage them to share their favorite moments or discoveries from the stargazing session.
14. Identify constellations
When nighttime falls, introduce the concept of constellations to the kids. Show them how to identify a few prominent constellations like Orion, Ursa Major (the Big Dipper), or Cassiopeia. Use a star chart or a stargazing app to help locate and recognize these constellations.
15. Observe the moon
If the moon is visible, spend some time observing its different phases. Point out features like craters, seas, and mountain ranges. Discuss the moon’s role in our solar system and its effects on Earth.
16. Look for planets
Check if any planets are visible in the night sky during your camping trip. Planets like Venus, Mars, Jupiter, and Saturn can often be spotted with the naked eye. Show the kids how to distinguish them from stars and discuss their unique characteristics.
17. Search for shooting stars
Encourage the kids to keep an eye out for shooting stars or meteors. Explain how they are fragments of debris that burn up as they enter Earth’s atmosphere. Make a game out of spotting shooting stars and counting how many they see.
18. Explore the Milky Way
Point out the hazy band of light that stretches across the night sky, known as the Milky Way. Discuss how it is made up of billions of stars and represents our galaxy. Encourage the kids to imagine the vastness of the universe.
19. Go on a Nature Hike
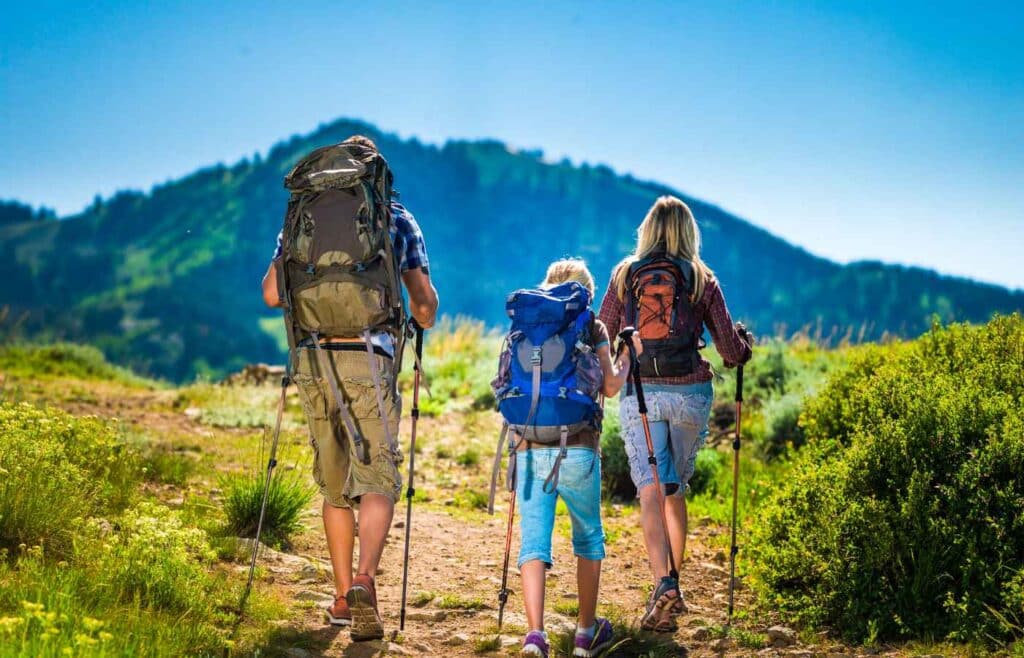
A nature hike is a great way to explore the outdoors, enjoy the beautiful scenery, and connect with nature. Grab your water bottles, and head out to explore!
- Choose a hiking trail or natural area suitable for your hike.
- Dress appropriately for the weather and terrain. Wear comfortable clothing and sturdy shoes.
- Pack essentials such as water, snacks, sunscreen, insect repellent, and a small first aid kit.
- Start your hike by walking at a comfortable pace, observing your surroundings.
- Engage your senses. Listen for bird songs, the rustling of leaves, or the sound of flowing water. Look for interesting plants, animals, or natural features along the trail.
- Encourage curiosity. Ask questions and discuss what you see with your hiking companions. Explore and investigate different elements of nature, such as rocks, trees, or wildflowers.
- Stay on the designated trail and respect the natural environment. Avoid disturbing plants and wildlife.
- Take breaks as needed to rest, hydrate, and appreciate the scenery.
- If allowed, take photos to capture memorable moments or interesting discoveries.
- Enjoy the hike and be mindful of your surroundings. Take in the beauty of nature and the peacefulness of the outdoors.
While you’re out hiking, it’s important to be prepared for nature’s surprises, like bee stings. Check out our 5 Simple Home Remedies for Bee Stings to be ready in case of an emergency.
20. Ponding
Ponding is always a great time for all ages! It allows kids to explore aquatic ecosystems and discover the fascinating creatures that live in ponds.
Look for a pond or other freshwater body in the camping area that is safe and accessible for exploration. Ensure that it is permitted to interact with the pond and its inhabitants.
Provide each child with a ponding kit, including items such as small nets, containers with lids, magnifying glasses, buckets, and field guides or pictures of common pond creatures.
Explain safety guidelines to the kids before starting. Emphasize the importance of staying near the edge of the pond, wearing appropriate footwear, and being cautious of slippery areas.
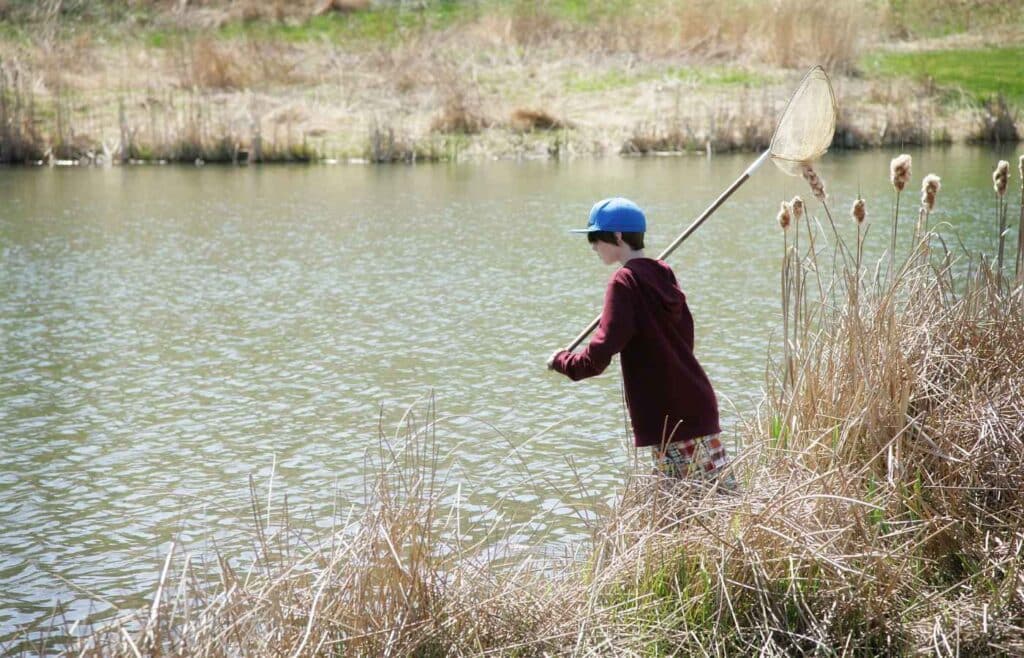
Here are great ideas for what to do while ponding:
- Explore the shoreline: Begin by examining the pond’s shoreline. Look for signs of animal activity, such as tracks, nests, or burrows. Discuss the importance of preserving the habitat and not disturbing these areas.
- Dip nets into the water: Demonstrate how to use nets to gently dip into the water, being careful not to disrupt the pond’s ecosystem. Encourage the kids to explore different areas of the pond, such as near vegetation or submerged logs.
- Observe and identify pond creatures: After each dip, carefully transfer the captured organisms into containers filled with pond water. Use magnifying glasses to closely observe the creatures’ features. Help the kids identify them using a field guide or reference materials.
- Discuss pond ecology: Engage the kids in discussions about the creatures they discover. Talk about the interconnectedness of pond life, such as the relationships between plants, insects, amphibians, and other animals.
- Learn about adaptations: Explore the unique adaptations of pond organisms. Discuss how their physical features and behaviors help them survive and thrive in their aquatic environment.
- Release the creatures: After observing and learning about the pond creatures, release them back into the water. Remind the kids of the importance of respecting and preserving the natural balance of the pond ecosystem.
- Reflect and share: Gather as a group to discuss the ponding experience. Encourage the kids to share their favorite discoveries, interesting facts they learned, or any surprises they encountered during the activity.
Ponding provides an opportunity for kids to connect with nature, learn about aquatic ecosystems, and appreciate the biodiversity within ponds. It fosters curiosity, observation skills, and a deeper understanding of the intricate web of life. Enjoy the adventure of ponding during your camping trip!
21. Bird Watching
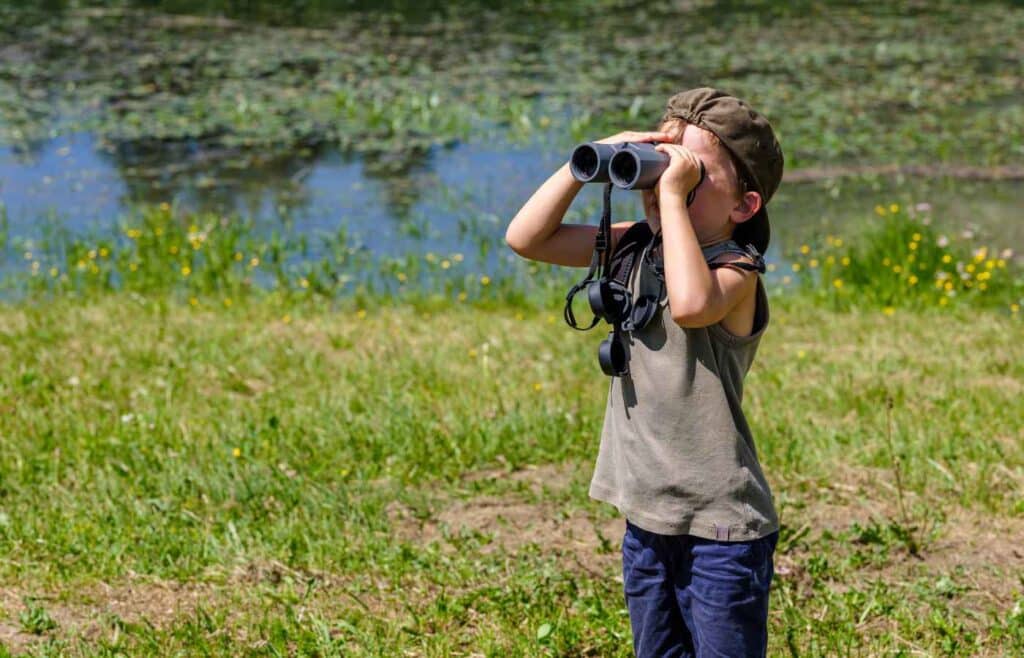
You may not think of it as one of the most fun activities for kids, but bird watching can be a fantastic activity to engage kids in nature during a camping trip. With a pair of binoculars and a bird identification book, you’re off to the races!
- Introduce bird watching: Explain to the kids that you will be observing and identifying different bird species during the camping trip. Share some interesting facts about birds to spark their curiosity.
- Bring kid-friendly equipment: Provide each child with a pair of binoculars suitable for their age and size. You can also bring along a simplified bird identification book or print out pictures of common birds in the area.
- Choose a birding location: Find a spot in the campground or nearby natural area where there is a good chance of spotting birds. Look for areas with trees, bushes, or bodies of water, as these attract a variety of bird species.
- Listen for bird sounds: Encourage the kids to listen carefully for bird songs, chirps, and calls. Help them identify different bird sounds and challenge them to mimic the sounds they hear.
- Observe bird behaviors: Ask the kids to observe how birds move, fly, or interact with their surroundings. Are they hopping on the ground, perching on branches, or diving into the water? This can provide clues to identify different bird species.
- Keep a bird journal: Provide each child with a small notebook and pencils. Ask them to draw or write about the birds they see, noting their observations, such as color, size, beak shape, or any distinctive markings.
- Play “I Spy” with birds: Take turns playing a game of “I Spy” where one person describes a bird they see and the others try to spot it using their binoculars. This adds a fun and interactive element to the bird watching experience.
- Create bird-friendly spaces: Back at the campsite, involve the kids in creating bird-friendly spaces by hanging bird feeders or placing bowls of water for birds to drink and bathe.
- Share and learn together: Take time to discuss the birds the kids have observed. Look up their names and learn more about their habitats and behaviors. Encourage the kids to share their favorite bird sightings and what they enjoyed most about the experience.
Bird watching with kids on a camping trip is a wonderful way to foster their curiosity, observation skills, and appreciation for nature. Make it a memorable and educational experience that encourages their love for birds and the great outdoors.
22. Identifying Animal Tracks
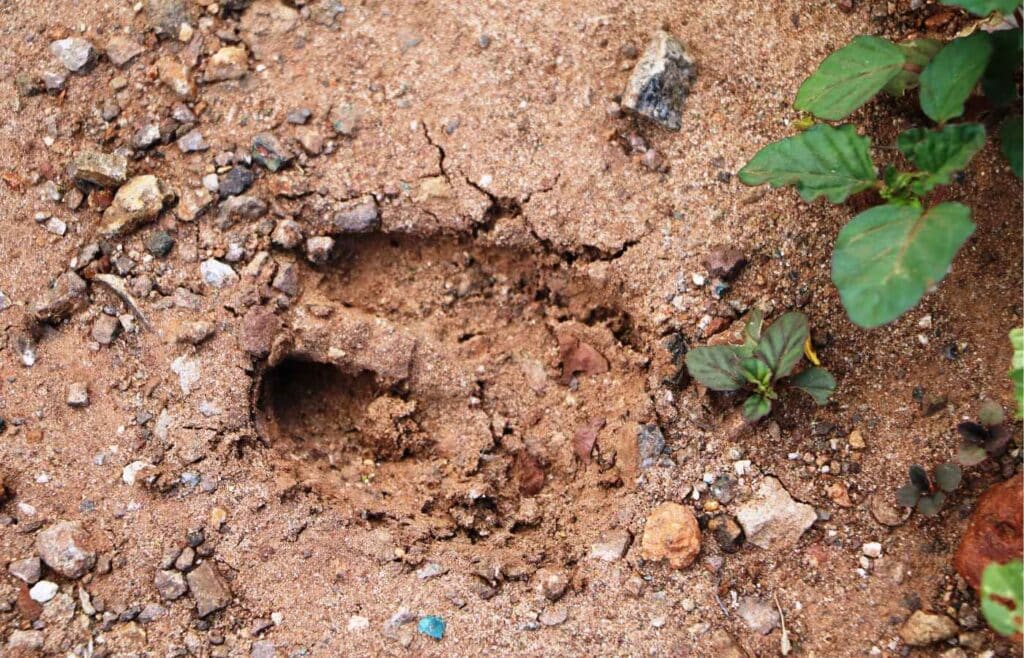
Identifying animal tracks with you little campers can be an exciting and educational activity for kids during a camping trip. Here’s a simplified guide to identifying animal tracks with kids:
Instructions:
- Gather materials: Before heading out, gather a field guide or print out pictures of common animal tracks in the area. You can also use a mobile app for animal track identification.
- Look for tracks: While hiking or exploring, keep an eye on the ground for tracks in soft soil, mud, sand, or snow. Animal tracks are often found near water sources, trails, or in areas with vegetation.
- Examine the tracks: Encourage the kids to crouch down and closely examine the tracks. Look for details such as the size, shape, number of toes, and the presence of claws or foot pads.
- Take measurements: Help the kids measure the track size using a ruler or a measuring tape. This can give them a sense of the animal’s size and help narrow down the possibilities for identification.
- Compare with the field guide: Refer to the field guide or app to compare the tracks you’ve found with the provided images and descriptions. Look for matching characteristics to identify the animal responsible for the tracks.
- Discuss animal behaviors: Engage the kids in a conversation about the animals that may have left the tracks. Talk about their habits, diet, and habitats based on the tracks you’ve identified.
- Track casting (optional): If you want to preserve the tracks, bring along some casting material like plaster of Paris. Carefully pour the mixture into the track, let it harden, and then remove it to take home as a souvenir.
- Encourage exploration: Encourage the kids to search for tracks of different animals. Discuss the differences between tracks made by mammals, birds, reptiles, or insects. Look for signs of scat, feathers, or fur as additional clues.
- Document and share: Provide each child with a notebook or journal to draw and describe the animal tracks they’ve found. Encourage them to write down their observations and share their findings with others.
- Respect wildlife: Remind the kids that it’s important to observe animal tracks from a distance and avoid disturbing the animals or their habitats.
Identifying animal tracks with kids on a camping trip can enhance their understanding of wildlife and their appreciation for the natural world. It’s a hands-on activity that encourages observation skills and sparks curiosity about the animals that inhabit the area.
23. Bug Hunt
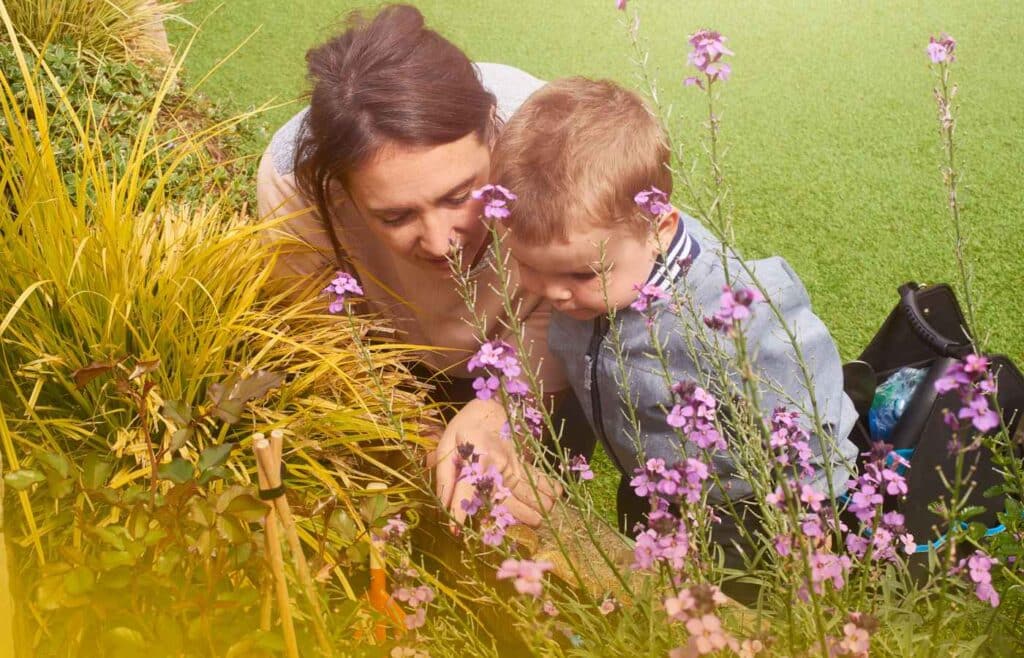
A bug hunt is an exciting and educational activity that allows young kids to explore the fascinating world of insects during a camping trip.
- Provide bug-catching tools: Give each child a bug-catching kit, which can include items like small nets, clear containers with lids, magnifying glasses, and a field guide or pictures of common insects.
- Set bug hunt boundaries: Establish a safe area for the bug hunt, such as a designated section of the campsite or a nearby natural area. Encourage kids to explore and search for bugs within this defined space.
- Encourage observation: Explain to the kids that they should observe bugs without harming them. Emphasize the importance of respecting nature and handling bugs gently.
- Search in different habitats: Encourage kids to look for bugs in various habitats, such as under rocks, logs, leaves, or in tall grass. Each habitat can harbor different types of insects.
- Use bug-catching techniques: Teach kids simple bug-catching techniques, such as using a net to gently scoop up flying insects or using a container to carefully collect crawling insects. Remind them to handle bugs with care and avoid harming them.
- Examine and identify: After catching bugs, have the kids place them in a clear container. Use magnifying glasses to closely observe the insects’ features, such as their body shape, legs, wings, and colors. Help them identify the bugs using a field guide or reference materials.
- Discuss insect characteristics: Engage the kids in conversations about the insects they find. Talk about the different body parts, life cycles, habitats, and behaviors of the bugs they observe. Encourage them to ask questions and share their observations.
- Release the bugs: Once the kids have finished observing and learning about the bugs, release them back into their natural habitats. Remind the kids of the importance of respecting and preserving the balance of nature.
- Create a bug journal: Provide each child with a notebook or journal to draw pictures of the bugs they encountered and write down their observations. This will allow them to document and remember their bug hunt experience.
- Reflect and share: Take time to reflect on the bug hunt as a group. Encourage the kids to share their favorite bug discoveries, interesting facts they learned, or any surprises they encountered during the activity.
Bug hunts offer a hands-on opportunity for kids to connect with nature and learn about the diverse world of insects. It encourages observation skills, curiosity, and a deeper appreciation for the tiny creatures that play important roles in our ecosystems. Enjoy the adventure of bug hunting during your camping trip!
24. Whittling
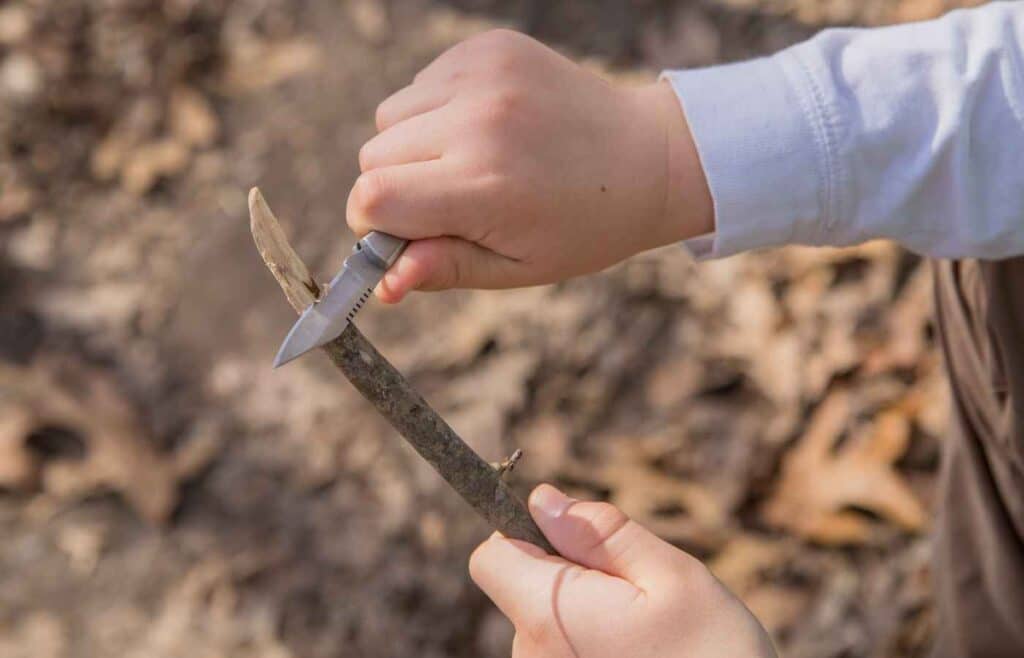
Whittling, also known as carving or woodcarving, is a popular outdoor activity that involves shaping and carving wood using a knife or other carving tools. It can be a rewarding and creative activity for kids during a camping trip that allows them to connect with nature and learn basic woodworking skills. Remember to supervise them the entire time.
Here’s a simplified guide to whittling with kids:
Instructions:
- Choose appropriate tools: Select child-friendly whittling tools such as a pocket knife or a child-sized carving set with rounded edges. Ensure the tools are sharp but suitable for their age and skill level. Safety should always be a priority.
- Discuss safety rules: Before starting, establish safety rules and guidelines. Teach kids how to hold and handle the tools correctly, emphasizing the importance of keeping fingers and hands away from the blade. Adult supervision is crucial throughout the activity.
- Select suitable wood: Find soft and manageable wood for whittling, such as pine or basswood. Collect small branches or blocks of wood from fallen trees or designated areas, making sure it is safe and permitted to collect wood in the camping area.
- Demonstrate proper technique: Show the kids how to hold the knife securely, using their dominant hand to hold the tool and the other hand to stabilize the wood. Demonstrate controlled and deliberate cuts away from the body.
- Start with simple shapes: Begin with simple whittling projects like carving a small stick into a pencil or a basic shape such as a whistle, a keychain, or a wooden spoon handle. Encourage creativity and imagination.
- Provide guidance and support: Offer guidance and assistance as needed. Help kids with initial cuts, demonstrate different carving techniques, and provide tips for smoothing and shaping their creations.
- Emphasize patience and focus: Whittling requires concentration and patience. Encourage kids to take their time and enjoy the process. Remind them to be mindful of their surroundings and to take breaks if they feel fatigued.
- Encourage creativity and storytelling: Whittling offers an opportunity for kids to express their creativity. Encourage them to carve designs, symbols, or characters that have personal meaning or tell a story. They can even create their own unique camping-related items.
- Sand and finish the creations: Once the carving is complete, use sandpaper or a whittling knife to smooth rough edges and surfaces. This step enhances the finished product and prevents splinters. Optionally, kids can apply non-toxic finishes like food-grade mineral oil for added protection.
- Celebrate and showcase: Celebrate the kids’ whittling achievements by displaying their creations or organizing a mini outdoor exhibition. Encourage them to share their experience with others and explain the stories behind their carvings.
Whittling with kids on a camping trip fosters creativity, patience, and fine motor skills. It provides a memorable experience that connects them to nature and encourages a deeper appreciation for handcrafted objects. Remember to prioritize safety, have fun, and enjoy the satisfaction of creating something unique with your own hands.
25. Animal Track Casting
Track casting is a fun and educational activity that allows kids to create a lasting impression of animal tracks they find during a camping trip. Here’s a simplified guide to track casting with kids:
Instructions:
- Find suitable tracks: While exploring the camping area, look for clear and distinct animal tracks in soft soil, mud, or sand. Choose tracks that are well-defined and not too large or small.
- Gather materials: Prepare a track casting kit with the following items:
- Plaster of Paris or a similar casting material
- Water
- Mixing container (such as a disposable cup)
- Stirring stick (a disposable spoon works well)
- Measuring cup or scoop
- Plastic bags or newspaper for clean-up
- Prepare the casting mixture: Follow the instructions on the plaster of Paris package to mix the appropriate amount of plaster and water in the mixing container. Make sure to achieve a smooth and pourable consistency.
- Pour the mixture: Carefully pour the plaster mixture into the track, ensuring it completely fills the track but does not overflow. Use the stirring stick to gently spread the mixture and remove any air bubbles.
- Let it dry: Allow the plaster to dry and harden completely. This may take several hours depending on the weather conditions. Remind the kids to be patient and avoid touching the casting until it is fully dry.
- Remove the casting: Once the casting is dry and hardened, carefully remove it from the ground. Use a small digging tool or stick to loosen the edges if needed. Take care not to break or damage the casting during removal.
- Clean-up: Dispose of any leftover plaster mixture properly. Clean the mixing container and stirring stick using water, or use disposable items that can be thrown away. Dispose of the plastic bags or newspaper used for clean-up.
- Document and discuss: Encourage the kids to examine the track casting closely. Observe and discuss the details of the track, such as the shape, size, and any distinguishing features. Compare it with the field guide or pictures to identify the animal that left the track.
- Preserve and display: If desired, the track casting can be kept as a souvenir or displayed at the campsite. It’s a tangible reminder of the animal tracks discovered during the camping trip.
Remember to respect wildlife and their habitats while track casting. Encourage kids to observe animal tracks from a distance and avoid disturbing the animals or their environment. Enjoy this hands-on activity that combines art and nature exploration on your camping adventure!
26. Compassing

Learning how to use a compass with kids on a camping trip is a fun and educational activity that can teach them valuable navigation skills. Here’s a simplified guide to using a compass with kids:
Instructions:
- Introduce the compass: Begin by explaining what a compass is and how it works. Show the kids the different parts of the compass, such as the magnetic needle, the direction arrow, and the rotating bezel with the cardinal directions (north, south, east, west).
- Teach the cardinal directions: Familiarize the kids with the cardinal directions by pointing them out on the compass and relating them to the actual directions in the environment. Help them understand that the needle always points to the magnetic north.
- Demonstrate how to hold the compass: Show the kids how to properly hold the compass. Instruct them to place the compass flat in the palm of their hand, making sure it is level and the direction arrow is pointing away from their body.
- Find the north: Teach the kids how to find the north using the compass. Instruct them to rotate their bodies until the magnetic needle aligns with the “N” on the compass. Emphasize that the needle should point to the north, helping them establish their bearings.
- Practice orienting the map: If you have a map of the area, explain how to orient it using the compass. Show them how to align the map’s north with the compass’s needle, ensuring that the map is correctly positioned.
- Follow directions: After orienting the map, teach the kids how to use the compass to follow directions. Explain that if they want to go in a specific direction, they need to rotate their bodies until the desired direction aligns with the compass’s direction arrow. Then, they can walk while keeping the compass aligned to maintain their chosen direction.
- Play compass games: Engage the kids in compass-related games to make learning more enjoyable. For example, you can create a treasure hunt where they need to follow compass directions to find hidden objects or markers. This activity combines navigation skills with a fun adventure.
- Explore landmarks: Take the kids on a short hike or walk in the camping area. Encourage them to use the compass to navigate to specific landmarks or points of interest. This allows them to practice using the compass in a real-world setting.
- Reinforce safety rules: Remind the kids about safety rules when using a compass. Teach them to hold the compass away from metal objects, electronics, or magnets, as they can interfere with its accuracy. Emphasize the importance of staying aware of their surroundings and not solely relying on the compass for navigation.
- Encourage exploration: Encourage the kids to explore and navigate using the compass throughout the camping trip. Let them take turns being the navigators and challenge them to find their way to different locations based on compass directions.
Learning how to use a compass with kids during a camping trip promotes their sense of adventure, enhances their navigation skills, and encourages them to explore the natural surroundings with confidence. It’s a valuable skill that can be applied in various outdoor activities. Enjoy the educational journey of using a compass with your young explorers!
27. Plant Identification
Plant identification with kids on a camping trip is a fantastic way to introduce them to the natural world and foster an appreciation for plant diversity. Teaching them how to identify dangerous plants like poison ivy is a great idea.
- Begin with basic plant parts: Start by teaching kids about the basic parts of a plant, such as leaves, stems, flowers, and roots. Explain their functions and how they contribute to a plant’s growth and survival.
- Explore different habitats: Take the kids on nature walks or hikes in various habitats, such as forests, meadows, or near bodies of water. Encourage them to observe and identify plants in their natural environments.
- Use field guides or apps: Provide kids with age-appropriate field guides or use plant identification apps that can help identify plants based on their characteristics. These resources often include pictures, descriptions, and information about common plants in the area.
- Focus on key features: Teach kids to look for distinctive features of plants, such as leaf shape, color, arrangement, and flower type. Discuss how these features can help in identifying different plant species.
- Engage in hands-on learning: Encourage kids to touch and smell plant leaves, flowers, or bark (when safe to do so). Help them notice unique textures, scents, or other sensory aspects that can aid in plant identification.
- Take samples or photographs: Allow kids to collect small plant samples like leaves or flowers in a responsible manner, if permitted in the camping area. Alternatively, they can take photographs of plants for later identification and study.
- Group activities: Organize group activities where kids can work together to identify and categorize plants. They can create a “plant scavenger hunt” checklist or play a game of “botanical bingo” to make it more interactive and engaging.
- Keep a plant journal: Provide each child with a notebook or journal to record their plant observations. They can draw pictures, write descriptions, or glue pressed plant specimens. Encourage them to add details like the location and date of the sightings.
- Research and learn: Help kids research and learn more about the plants they encounter. Discuss interesting facts, medicinal uses, or ecological roles of specific plants. Encourage them to share their findings and knowledge with others.
- Respect nature: Teach kids about the importance of respecting and preserving the natural environment. Remind them to take only photographs or small samples, leaving plants undisturbed in their habitats.
Plant identification with kids on a camping trip promotes curiosity, observation skills, and an understanding of the intricate relationships within ecosystems. It cultivates a sense of wonder and connection to the natural world. Enjoy exploring and discovering the diverse plant life together!
28. Edible Hike
Embarking on edible hikes with kids on a camping trip is a delightful adventure that combines exploration and culinary discovery.Before the hike, familiarize yourself with common edible plants in the area. Focus on easily identifiable and safe options such as berries, nuts, leaves, and flowers. Make sure to accurately identify the plants and understand any potential risks or allergies.
As you venture into the wilderness, keep an eye out for edible plants, berries, or mushrooms that are safe to consume. Start by emphasizing the importance of safety during the edible hike. Teach kids not to eat anything without adult approval and guidance. Emphasize the importance of proper identification and caution when trying new plants.
Encourage the kids to engage their senses, taste, and smell as they discover and sample nature’s edible treasures. Whether it’s snacking on wild berries, nibbling on edible flowers, or identifying and gathering edible plants, the edible hike offers a unique and delicious way to connect with the natural environment. It’s a hands-on learning experience that teaches kids about foraging, plant identification, and the incredible flavors found in the wild.
29. Nature Photography
Nature photography with kids on a camping trip is a wonderful way to encourage their creativity, observation skills, and appreciation for the natural world.
- Provide cameras or smartphones: Equip each child with a camera or smartphone with a camera app. Make sure they understand how to use it, including focusing, zooming, and capturing images.
- Teach basic photography techniques: Introduce kids to basic photography techniques such as composition, lighting, and perspective. Show them how to frame their shots, experiment with angles, and use natural light to enhance their photographs.
- Encourage exploration: Allow kids to explore their surroundings and photograph what interests them. Encourage them to look closely at plants, animals, landscapes, textures, and patterns.
- Focus on details: Encourage kids to capture close-up shots of intricate details in nature, such as the veins of a leaf, the texture of tree bark, or the delicate petals of a flower. This helps develop their observation skills and appreciation for the small wonders of nature.
- Experiment with different subjects: Guide kids to photograph a variety of subjects, including plants, insects, birds, landscapes, and even their camping companions. This allows them to explore different aspects of nature and unleash their creativity.
- Discuss storytelling: Help kids understand how photographs can tell a story or convey emotions. Encourage them to think about what story or feeling they want their photographs to evoke and guide them in capturing moments that tell a visual narrative.
- Foster patience and observation: Teach kids to be patient and observant while waiting for the perfect shot. Encourage them to take their time, observe the behavior of animals, and anticipate interesting moments to capture.
- Share photography tips: Provide guidance and share photography tips with the kids. Discuss composition techniques like the rule of thirds or leading lines. Help them understand the impact of different angles and perspectives on their photographs.
- Group critique and discussion: Set aside time for group discussions and critiques of the photographs taken. Encourage kids to share their favorite shots, explain their creative choices, and provide positive feedback to their peers.
- Create a nature photo album: After the camping trip, help the kids create a nature photo album or a digital slideshow of their best photographs. Display their work, and celebrate their creativity and unique perspectives.
Nature photography allows kids to express their creativity while developing their observation skills and fostering a deeper connection with the natural world. It encourages them to see beauty in the details and to capture moments that can be cherished for a lifetime.
30. Rock Collecting
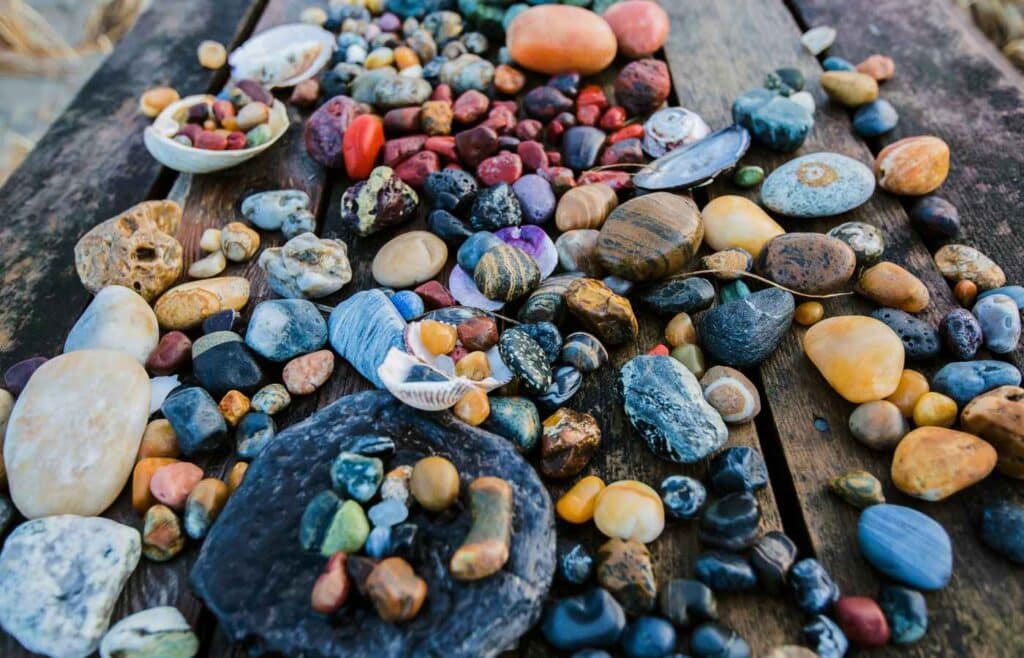
Starting a rock collection with kids on a camping trip is an exciting and educational activity that can ignite their curiosity about geology and the natural world.
- Explain the basics: Begin by explaining the concept of a rock collection and why it can be fascinating to learn about different types of rocks. Discuss how rocks are formed, their composition, and the variety of colors, shapes, and textures they can have.
- Provide collection tools: Equip each child with a small bag or container to collect rocks. It’s also helpful to have a magnifying glass or a pocket-sized geology guidebook to examine and identify rocks.
- Search for rocks: Take the kids on nature walks or hikes in different areas to search for rocks. Encourage them to explore various environments such as riverbanks, mountainsides, or rocky trails to find a diverse range of rocks.
- Collect a variety of rocks: Encourage kids to collect rocks of different sizes, shapes, colors, and textures. Remind them to choose rocks that are safe to handle and not too heavy to carry. Encourage them to pay attention to any unique or interesting features they notice.
- Discuss rock characteristics: Engage the kids in conversations about the characteristics of the rocks they collect. Talk about the different types of rocks like igneous, sedimentary, and metamorphic. Explain how to identify features like crystal structures, layering, or fossil imprints.
- Learn about rock types: Help the kids research and learn more about the rocks they’ve collected. Use books or online resources to identify the rock types and their properties. Discuss the geological processes that form different rocks.
- Label and organize: Have the kids label and organize their collected rocks. They can use small tags or labels with the rock’s name, location found, and any other relevant information. This helps them remember where they found the rock and learn more about its characteristics.
- Create a display: Encourage the kids to create a display for their rock collection. Rock stacking is also a lot of fun. (My kids agree!)This can be a designated area in their tent or campsite, or they can arrange the rocks on a tray or in a shadow box. Displaying their rocks can spark conversations and further their interest in geology.
- Expand knowledge: Take advantage of the camping trip to visit local geological sites or landmarks. This provides an opportunity for the kids to see rocks in their natural environments and learn more about the geological history of the area.
- Share and discuss: Set aside time for the kids to share their rock collection with each other and discuss their favorite rocks. Encourage them to talk about what they find intriguing or unique about each rock.
Starting a rock collection with kids during a camping trip nurtures their curiosity, encourages scientific exploration, and promotes a deeper understanding of the Earth’s geology.
31. Tree Identification
Tree identification with kids on a camping trip promotes their observation skills, appreciation for nature, and understanding of the diversity of trees. It also provides an opportunity to connect with the environment and learn about the important role trees play in our ecosystem.
Leaf identification: Teach the kids to look closely at the leaves of the trees. Discuss variations in leaf shape, size, and texture. Encourage them to compare the leaves they find with illustrations or pictures in a field guide or tree identification app.
Bark observation: Help the kids examine the bark of different trees. Talk about the texture, color, and patterns they notice. Encourage them to use descriptive words to describe the bark, such as rough, smooth, peeling, or ridged.
Twig and branch examination: Show the kids how to examine the branches and twigs of trees. Discuss the arrangement and patterns of the branches, as well as any distinctive characteristics they observe. Help them understand the difference between opposite and alternate branching.
Shape and size: Discuss the overall shape and size of trees. Teach the kids to identify basic shapes like tall and slender, round and spreading, or weeping. Help them observe the tree’s canopy and how it contributes to its overall shape.
Interactive exploration: Take the kids on a nature walk where they can actively look for different trees. Encourage them to touch the leaves, feel the bark, and closely observe the tree’s features. Point out specific trees you have identified and explain their characteristics.
Keep a nature journal: Provide the kids with a notebook or journal to record their findings. They can sketch the leaves, bark, and other distinctive features of the trees they encounter. They can also write down any observations or notes about each tree.
Recognition games: Make the activity more interactive by playing tree identification games. Create a scavenger hunt where the kids have to find specific trees based on clues or descriptions. You can also challenge them to match leaf samples to the corresponding tree species.
Encourage curiosity: Foster a sense of curiosity and exploration by answering their questions and encouraging them to ask more. If there are trees you are unsure about, make it an opportunity to research and learn together.
32. Nature Scavenger Hunt
Create a nature-themed scavenger hunt for your kids. Provide them with a list of items they need to find, such as specific leaves, flowers, rocks, or natural objects. This activity will keep them engaged and curious about their surroundings.
33. Nature Collage
Creating a nature collage with kids on a camping trip is a wonderful way to celebrate the beauty of the outdoors and engage in artistic expression. Explore the surrounding environment, collecting a variety of natural materials such as leaves, flowers, twigs, and stones.
With a large piece of paper or cardboard as the base, arrange and glue the collected items to form a collage that showcases the unique colors, textures, and shapes of nature. As you create, discuss the different elements and their significance, fostering a deeper connection to the natural world. The nature collage becomes a visual representation of the camping trip and a cherished keepsake of the shared experience.
34. Nature Painting
Painting rocks with crushed berries or flower petals is a creative and nature-inspired activity for kids on a camping trip. Gather a variety of rocks, along with berries or flower petals that can be easily crushed to extract their vibrant colors. Use a mortar and pestle or simply crush them with your fingers to create a natural pigment.
Dip brushes or fingers into the crushed berries or petals and apply the colors onto the rocks, letting your imagination guide the designs. The result is a collection of beautifully painted rocks adorned with the vibrant hues of nature. Painting rocks with crushed berries or flower petals allows kids to explore the natural world while expressing their creativity in a unique and eco-friendly way.
35. Leaf & Bark Rubbings
All you need are some leaves, thin paper, and crayons or colored pencils. Collect leaves of different shapes and sizes, place a leaf on a flat surface, and put a piece of thin paper on top of the leaf. Use a crayon or colored pencil to gently rub over the paper, directly on top of the leaf. Apply even pressure.
As you rub, the shape and texture of the leaf will appear on the paper. Try different leaves and experiment with different colors, then display or decorate your leaf rubbings as desired.
36. Nature Sound Map
Have your kids create a sound map by sitting quietly in different areas of the camping site and mapping out the sounds they hear. They can draw symbols or write words to represent each sound they identify, such as bird songs, rustling leaves, or flowing water.
37. Nature Journaling
Encourage your kids to keep a nature journal throughout the camping trip. They can sketch plants and animals they encounter, write about their observations and feelings, and even press flowers or leaves to include in their journal.
38. Fairy or Gnome Homes
Spark your children’s imagination by building miniature homes for fairies or gnomes using natural materials like sticks, leaves, and rocks. Let them create a magical village in a hidden corner of the camping area.
39. Mud Pies

Making mud pies with kids during a camping trip is a fun and messy activity. Find a soft mud patch and gather materials like buckets and natural decorations. Help the kids prepare the mud by adding water gradually. Let them shape the pies using their hands or buckets.
Encourage them to decorate the pies with leaves, flowers, or rocks. Display their creations and encourage imaginative play. Remind them to clean up after themselves. Mud pies allow kids to explore their senses and be creative in nature. Enjoy their messy masterpieces!
40. Nature Weaving
Teach your kids how to weave using natural materials like long grass, vines, or flexible twigs. They can create small baskets, mats, or even decorative wall hangings using their weaving skills.
41. Nature Masks
Collect leaves, flowers, and other natural materials to create nature-themed masks. Your kids can use string or vines to tie the materials together and transform themselves into forest creatures or magical beings.
42. Shadow Tracings
Shadow tracings with kids on a camping trip is a playful and creative activity that combines the magic of shadows with artistic expression. Find a sunny spot and provide paper and pencils. Encourage the kids to position objects or themselves in a way that casts interesting shadows onto the paper.
They can trace the outlines of the shadows, capturing their unique shapes and forms. The result is a collection of artistic interpretations of the captivating interplay between light and shadow. Shadow tracings foster imagination, observation, and a deeper appreciation for the wonders of nature.
43. I Spy
Playing “I Spy” with kids on a camping trip is a delightful game of observation and imagination. Gather in a scenic spot, such as around a campfire or on a nature hike, and take turns being the “spy.” The spy selects an object within sight and says, “I spy with my little eye, something that is…” followed by a clue about the object’s color, shape, or location.
The other players take turns guessing the object, using their observation skills and creativity. “I Spy” engages the senses, encourages exploration of the surroundings, and creates moments of excitement and discovery amidst the natural beauty of the camping environment.
44. Play Cards
Playing a card game in the tent is a cozy and entertaining way to pass the time during a camping trip. Gather your deck of cards and settle into the comfort of your tent.
Whether it’s a competitive game of Poker, a strategic round of Rummy, or a lighthearted game of Go Fish, the soft glow of lanterns or headlamps adds to the ambiance as you shuffle, deal, and strategize. Playing cards in the tent brings laughter, friendly competition, and shared moments of fun, making it a memorable part of your camping experience.
45. Board Games
Set up a cozy spot at the picnic table, bring out your favorite board games, and let the laughter and friendly competition begin. Roll the dice, move the game pieces, and strategize your way to victory.
The picnic table provides a convenient and comfortable space to spread out the game boards and enjoy hours of entertainment. Playing board games on a camping trip creates cherished memories and strengthens family connections in the midst of nature’s beauty.
46. Watch the Sunrise
Wake up early and find a comfortable spot outdoors, such as a hilltop or lakeside, where you can witness the beauty of nature unfolding. As the first rays of sunlight paint the sky in vibrant colors, encourage the kids to observe the changing landscape and the sense of tranquility that comes with the dawn.
Talk about the wonders of nature and the significance of starting the day with a sense of wonder and gratitude.
47. Watch the Sunset
As the day draws to a close, find a cozy spot where you can all settle in to witness the vibrant colors and peaceful atmosphere. Encourage the kids to observe the changing sky, from the warm hues of orange and pink to the deepening blues of twilight.
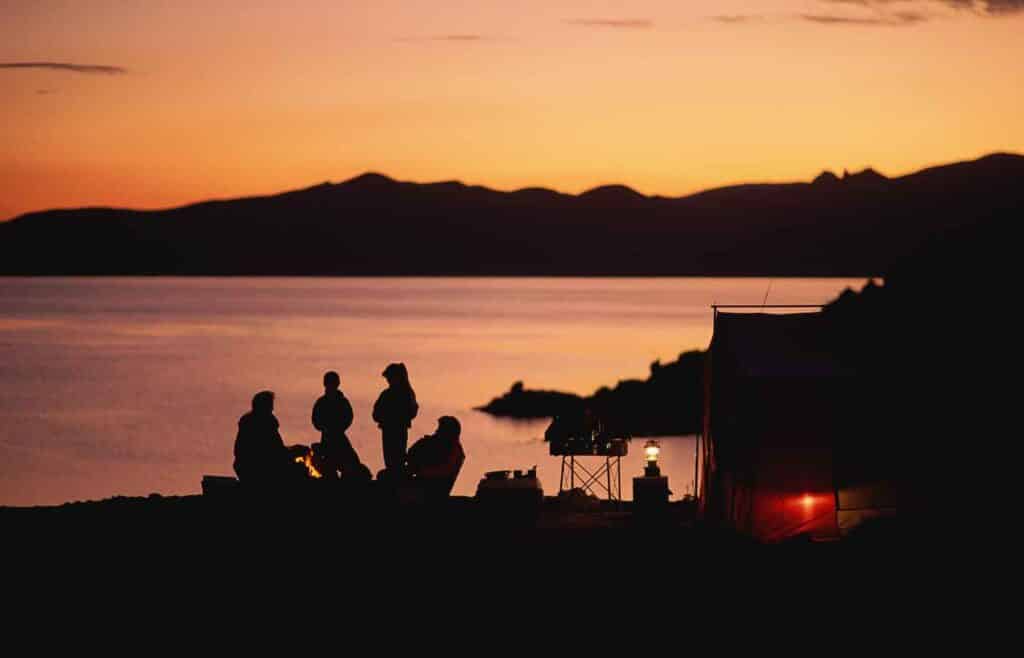
Talk about the beauty of nature and the significance of appreciating the simple joys in life. Watching the sunset with kids creates a sense of wonder and connection to the natural world, leaving them with cherished memories of the camping trip.
48. Nature Storytelling
Find a cozy spot in nature and take turns telling stories inspired by the surroundings. Encourage your kids to let their imagination run wild and create tales of adventure, mystery, or mythical creatures.
49. Glow Stick Dance Party
A glow stick dance party on a camping trip with kids is an exciting way to create lasting memories. Gather glow sticks and accessories for each child.
Turn on the music to an appropriate level that won’t disturb other campsites, and invite the kids to dance. (Here are the best kids dance songs!) Encourage them to freestyle or follow simple dance moves. Incorporate fun glow stick activities into the dance party. Play interactive games like “Freeze Dance” or “Musical Statues.” Capture the moment with photos or videos. . Enjoy the glowing fun and create unforgettable camping memories!
50. Leave No Trace Challenge
A Leave No Trace challenge teaches kids to be mindful of nature and shows them that their actions can make a positive impact. Enjoy the challenge and inspire a love for the environment!
Tell the kids that the challenge is about keeping nature clean and safe. Talk about simple actions like picking up trash, staying on the trails, and being kind to animals.
Create a list of things they need to do, like picking up litter, not disturbing plants or animals, and staying on the paths.
Encourage the kids to use these rules whenever they’re in nature. Remind them to be responsible and respectful.
Camping trips provide the perfect opportunity for kids to immerse themselves in nature and engage in a wide range of exciting activities.
From nature hikes and wildlife exploration to creative endeavors like crafting, painting, and building, there are countless ways to create lasting memories and foster a deep connection with the natural world.
Whether it’s observing the sunrise, playing games by the campfire, or embarking on edible hikes, these activities ignite a sense of wonder, spark imagination, and promote learning in a hands-on and enjoyable way.
So pack your gear, gather the family, and embark on a camping adventure filled with endless fun and unforgettable experiences.
The great outdoors await, ready to be explored and cherished by kids of all ages.
Related Posts
15 Beautiful Wisconsin State Parks Near Milwaukee
25 Gorgeous Hikes Around Milwaukee
100 Best Outdoor Activities For Kids
100 Fun Backyard Activities Your Kids Will Love
25 Best Flashlight Games For Kids
100 Best Frog Names For Your Lily Pad Leaper
Calie Herbst, Editor-in-Chief of Milwaukee With Kids, has spent over a decade combining her experiences as a parent of three to create a hub for Milwaukee’s family adventures.
Her decade-long teaching career in Milwaukee Public Schools and academic background, including a Master’s in Teaching from Marquette University and dual B.A.s in Sociology and Spanish from the University of Wisconsin – Madison, fuel her passion for inclusive and engaging family content.
Calie is also a recognized voice in local media, contributing to WISN Channel 12 News, WTMJ Wisconsin Morning News, Fox 6’s Real Milwaukee, and B93.3.
Discover more about Calie’s journey and editorial approach on her About Page and Editorial Policy Page.


